Table of Contents
- PlayStationでBedrockサーバーに接続する方法 STEP1. PlayStationのメインメニューから、設定アイコンまでスクロールします。
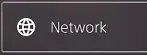
- STEP2. 下にスクロールしてネットワークタブに移動します。
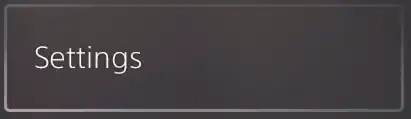
- STEP3. 設定まで移動します。
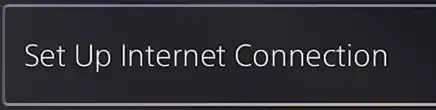
- STEP4. インターネット接続のセットアップを選択します。 STEP5. 現在使用している接続で、Playstationコントローラの [オプション] ボタンを押し[Advanced Settings] を選択します。
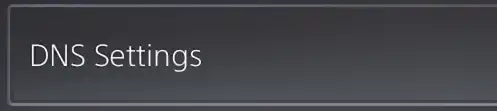
- STEP6. DNS設定を選択します。
- STEP7. 自動から手動に切り替えます。
- STEP8. プライマリDNSには、コード 104.238.130.180 を使用します。
- STEP9. セカンダリDNSの場合は、コード 8.8.4.4 を使用します。
- STEP10. OKを選択します。
- STEP11. Minecraft Bedrock Editionを開きます。
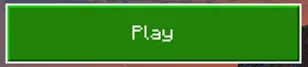
- STEP12. Playを押します。
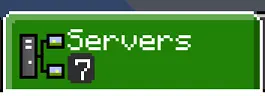
- STEP13. RBとLBサーバータブまでスクロールします。
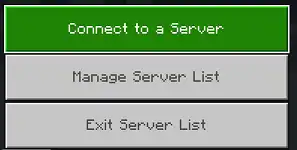
- STEP14. サーバー上で、 「Join Server(サーバーに参加)」ボタンを選択します。
- STEP15. 接続したら、 サーバーに接続オプションを選択します。
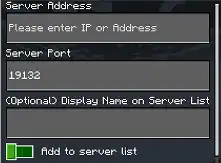
- STEP16. フィールドに以下を入力します。
| explanatory note | DNS設定を変更すると、プレイヤーはBedrockConnectに接続できるようになり、コンソール機は任意のサーバー IPとパブリックDNSに接続できるようになります。 |
PlayStationでBedrockサーバーに接続する方法
STEP1. PlayStationのメインメニューから、設定アイコンまでスクロールします。
STEP2. 下にスクロールしてネットワークtab.
STEP3. setting (of a computer or file, etc.)まで移動します。
STEP4. インターネット接続のセットアップSelect the
STEP5. 現在使用している接続で、Playstationコントローラの [オプション] ボタンを押し[Advanced Settings] を選択します。

STEP6. DNS設定を選択しますThe following is a list of the most common problems with the
STEP7. 自動から手動に切り替えますThe following is a list of the most common problems with the

STEP8. プライマリDNSには、コード 104.238.130.180 を使用します。

STEP9. セカンダリDNSの場合は、コード 8.8.4.4 を使用します。

STEP10. OKを選択します。

STEP11. Minecraft Bedrock Editionを開きます。
STEP12. Playindicates object of desire, like, hate, etc.押します。
STEP13. RBandLBserverタブまでスクロールします。
STEP14. サーバー上で、 「Join Server(サーバーに参加)」Select the button.

STEP15. 接続したら、 サーバーに接続オプションを選択します。
STEP16. フィールドに以下を入力します。
・Server Address– サーバーに接続するためのアドレス。(ゲームパネルのダッシュボード上に表示されているIPアドレス)
・Server Port– サーバーに接続するためのポート。(ゲームパネルのダッシュボード上に表示されているポート番号|例:0.0.0.0:ポート番号)
・Display Name on Server List(サーバーリストの表示名)– サーバーの名前を設定します。
・Add to server list(サーバーリストに追加)– チェックすると、サーバーがサーバー リストに表示されます。