前提
ゲームパネルへログインしてください。 ゲームパネルへのログイン方法はこちら
改訂履歴
- 1.0:
- 作成日時: 2024/1
- 更新内容: 初版作成
- 作成者: BESTNET-GSERVER
STEP1. インストールが完了するのを待ってください。
お客様がお申込みを完了し、サービスステータスがアクティブになるとゲームサーバーのインストールが開始されます。 インストール中は以下画像のようになっておりほとんどの情報を見る事ができません。 この画面は数分で終了します。

サーバーのインストールが完了すると弊社ゲームパネルシステムからインストール完了のメッセージがお客様メールアドレスに送信されます。
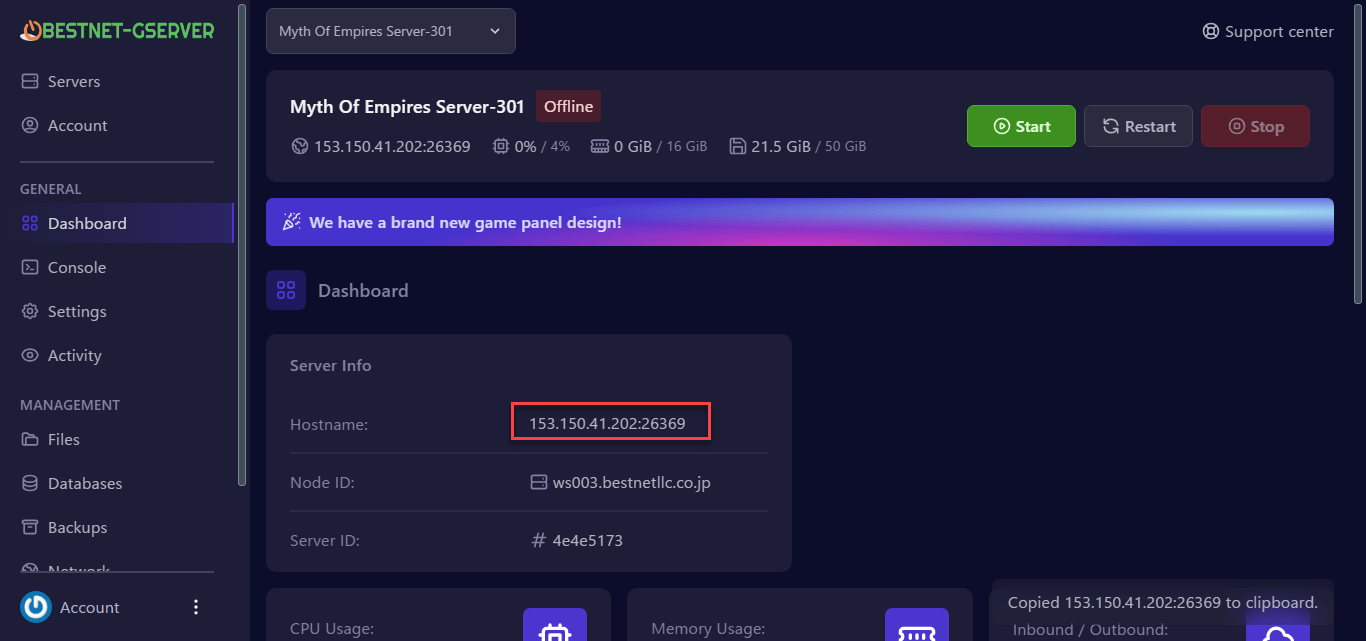
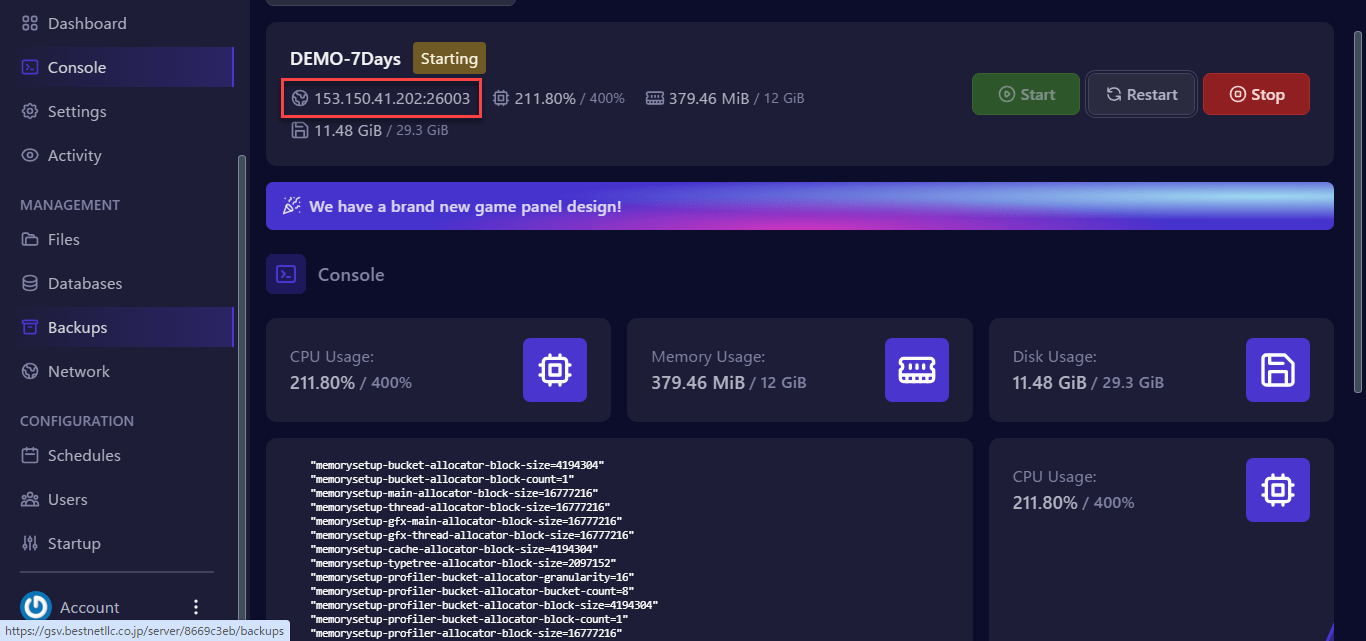
STEP2. ゲームポートの確認
ゲームパネルのサーバーコンソールでゲームポートを確認する事ができます。 以下画像の場合はポート番号が26369になります。 画像赤枠の箇所をクリックすると自動でコピーされます。
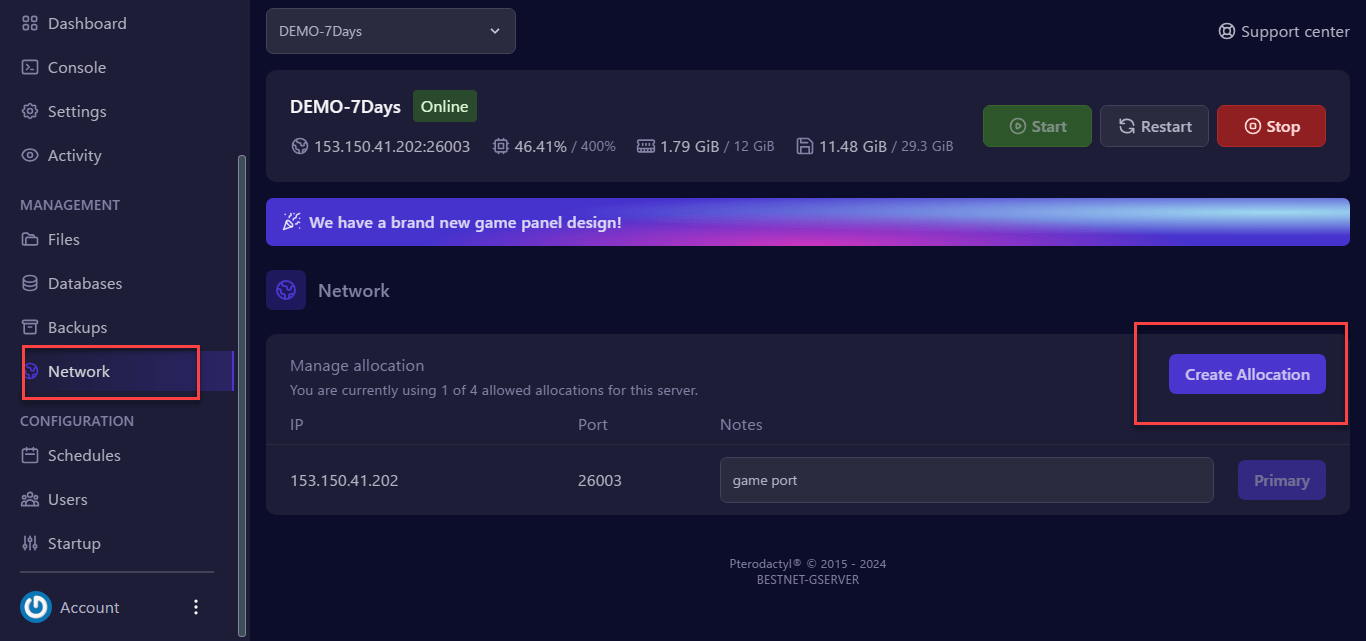
STEP3. ポートの追加割り当て
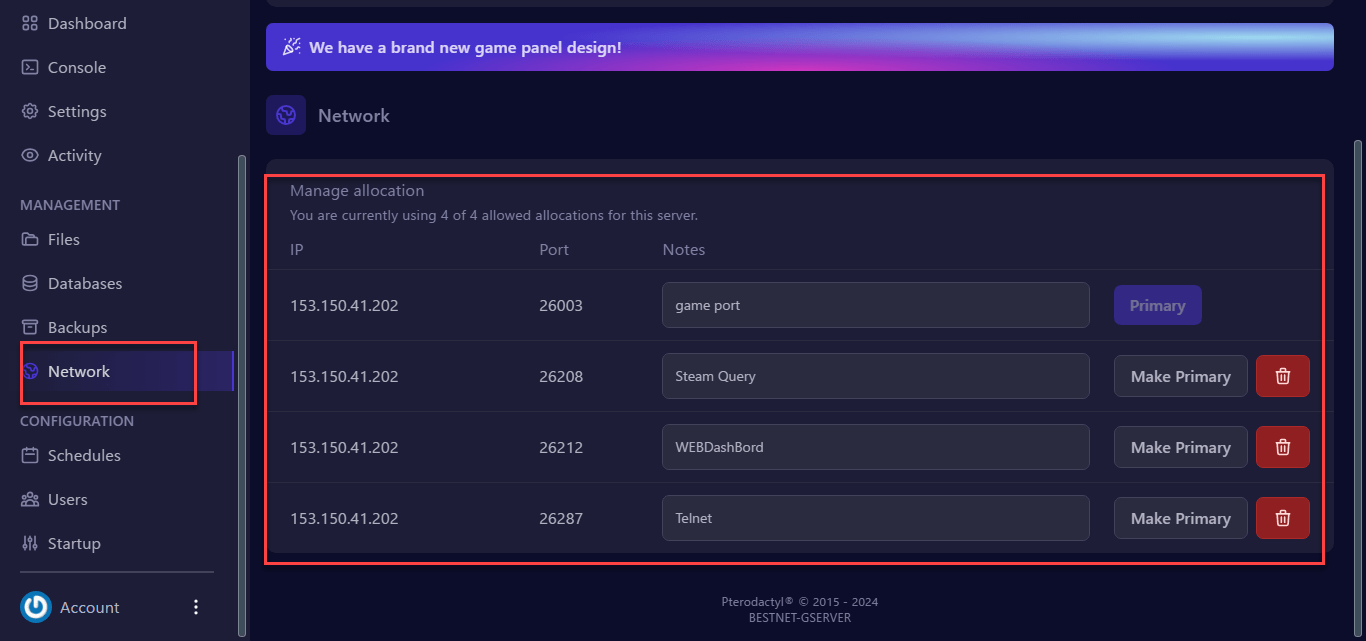
7Days to dieゲームサーバーはゲームポートの他に3個のポートが必要になります。 ゲームパネルの’Network’タブに移動し、’CREATE ALLOCATION’ボタンを3回押してください。 すると、以下画像のように3個のポートが追加されます。 ※混乱しないように各ポートの役割をメモする機能があります、以下画像では各ポートに役割を記載しています※
追加の3ポート
1:26208=Steam Query
2:26212=WEBDashBord
3:26287=Telnet
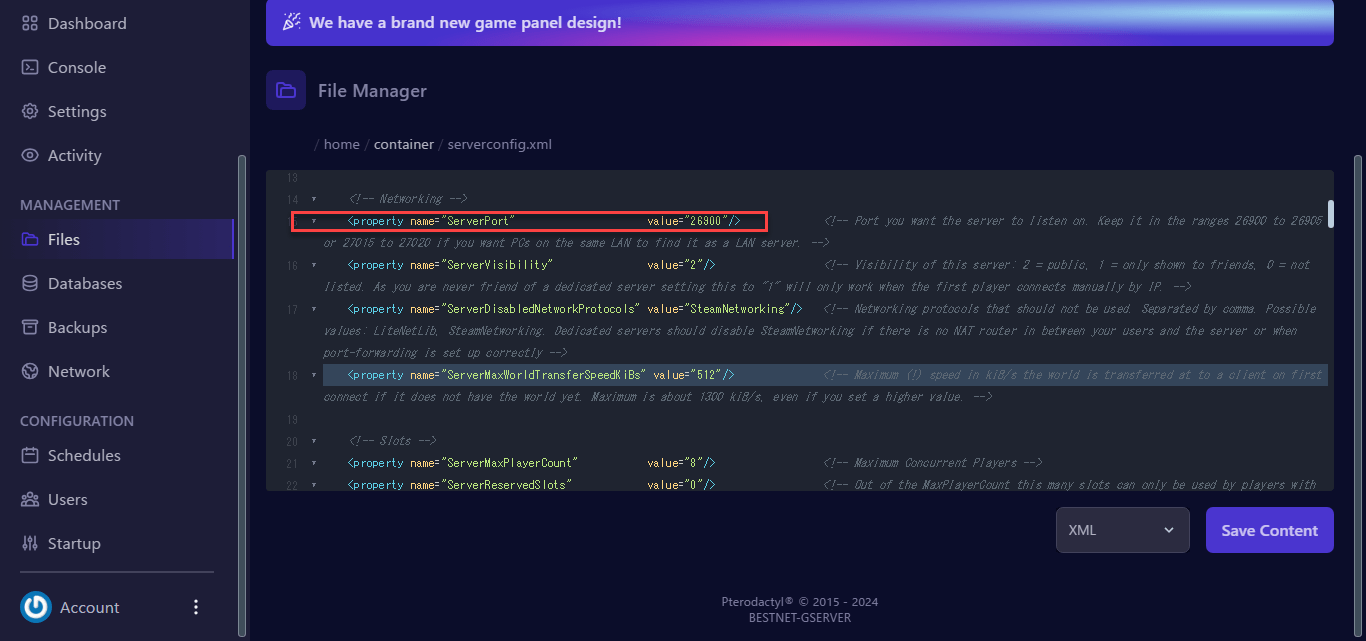
STEP4. 設定ファイルの編集
追加割り当てしたポート番号を設定ファイルに記載する必要があります。 ゲームパネルのファイルブラウザで’serverconfig.xml’を開いてください。 場所=/home/container/serverconfig.xml
STEP5. Steam Queryポートの設定
開いた設定ファイルの15行目(property name=”ServerPort” value=”ここに記載する”)に手順6で実際に割当られたポート番号を記載してください。
STEP6. WEBダッシュボードポートの設定
開いた設定ファイルの29行目( )に手順6で実際に割当られたポート番号を記載してください。 ポート番号は一意である必要があるので、例えばSteam Queryポートで使用しているポート番号を記載するなどして重複する事が無いように注意してください。
ウェブダッシュボードはデフォルトでは無効化されています(28行目)、使用したい場合は以下のように値を’false’から’true’に変更してください。

最後に’SAVE CONTENT’ボタンをクリックしてください。
STEP7. 設定の適用
これらの設定を反映する為にはサーバーを再起動する必要があります。 ’Consol’タブに移動し、’Restart’ボタンをクリックして再起動を実施してくださ。
その他ご不明点が有る場合はチケットを提出してください。