How to Add an Administrator to Your Server
1. Prerequisites
Please log in to the Game Panel.
For instructions on how to log in to the Game Panel, please see here
2. Revision History
- 1.0:
- Creation Date: 2024/1
- Update Details: Initial version created
- Created by: BESTNET-GSERVER
3. Table of Contents
- 1. Prerequisites
- 2. Revision History
- 3. Table of Contents
- 4. Obtaining a Backup
- 5. Opening the ‘adminlist.ext’ File
- 6. Entering the SteamID64 of the Player You Want to Make an Administrator
- 7. Clicking ‘SAVE CONTENT’
- 8. Entering -console in the Launch Options of the Valheim Client
4. Obtaining a Backup
Please obtain a backup before proceeding with the operation.
Backups can be easily created from the Game Panel and restored with a single click.
Please refer to the following:
Backup acquisition instructions are here
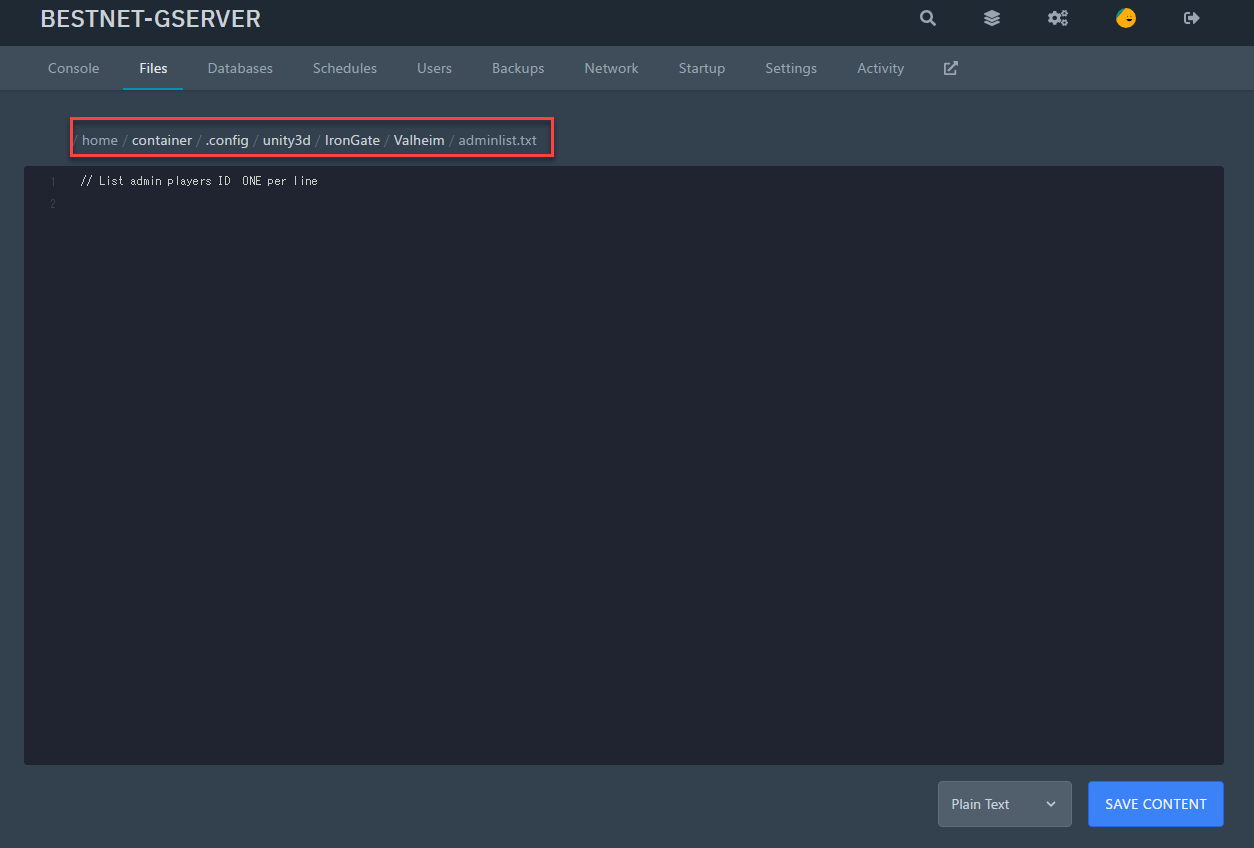
5. Opening the ‘adminlist.ext’ File
Please open ‘adminlist.ext’ using the file browser in the Game Panel.
This file is located at the following path:
.config/unity3d/IronGate/Valheim/adminlist.txt
6. Entering the SteamID64 of the Player You Want to Make an Administrator
Please enter the SteamID64 of the player you want to make an administrator, one per line.
In the example image below, two SteamID64s are entered, meaning two players are set as administrators.
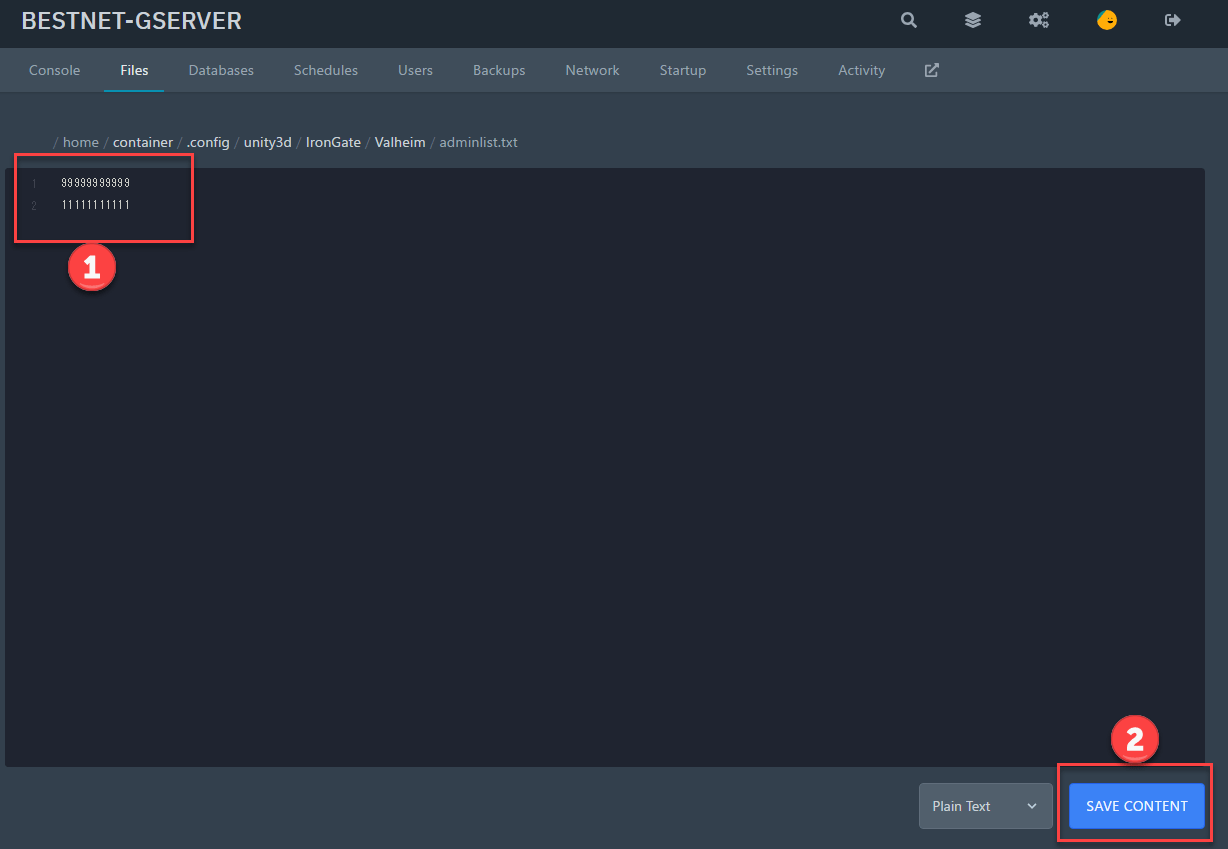
7. Clicking ‘SAVE CONTENT’
The settings will be saved and applied.
8. Entering -console in the Launch Options of the Valheim Client
By default, the Valheim client does not allow command input console use in-game.
This means that even if you become an administrator user, you will not be able to use administrator commands.
Therefore, right-click on Valheim in your Steam library, go to Properties, and in the Launch Options field under the General tab, enter -console.
If you have any other questions, please submit a ticket.