The game panel provides all the features necessary for server operations. This article comprehensively covers everything from login methods to feature overviews and FTP connection.
Prerequisites
The game panel provides all the features necessary for server operations. Login is very straightforward; please review the following guide in order.
Confirming Login Information
Login information is included in the automated email sent from our system upon order completion. You can also confirm it in the client portal by following these steps:
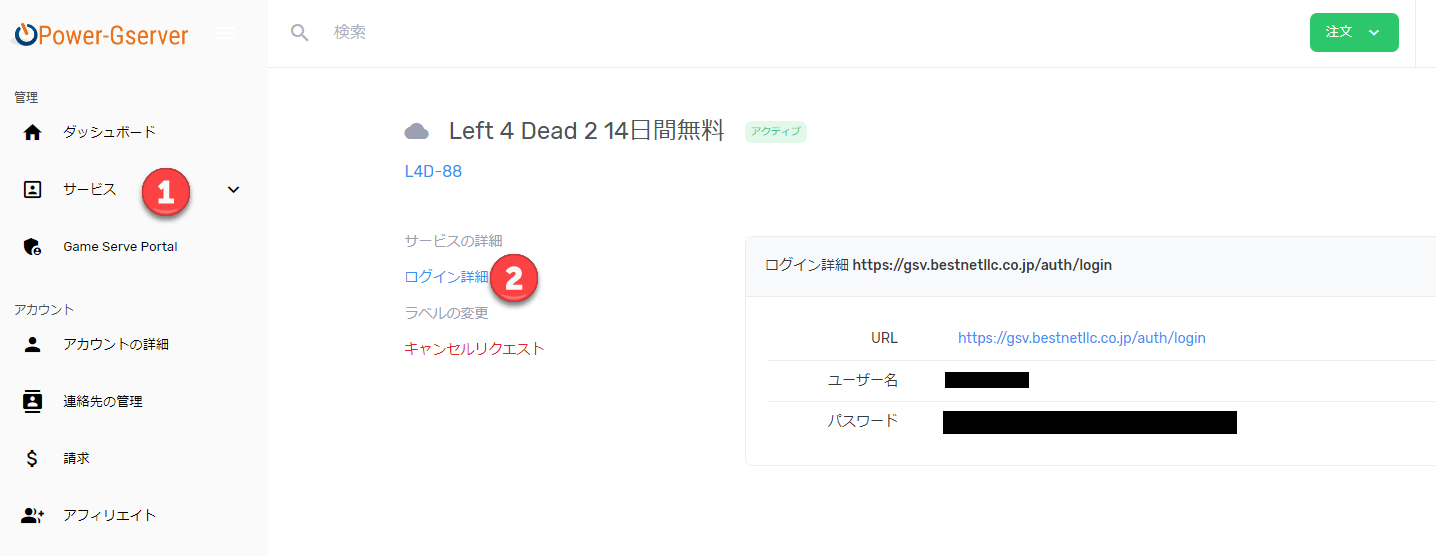
- Log in to the client portal and click “Services” in the top menu
- Click on your contracted server and click “Login Details”
Login information will be displayed as shown in the image below.
Logging in to the Game Panel
Next, log in to the game panel using the login information displayed above. Simply enter your username and password, then click the “Login” button.
Dashboard
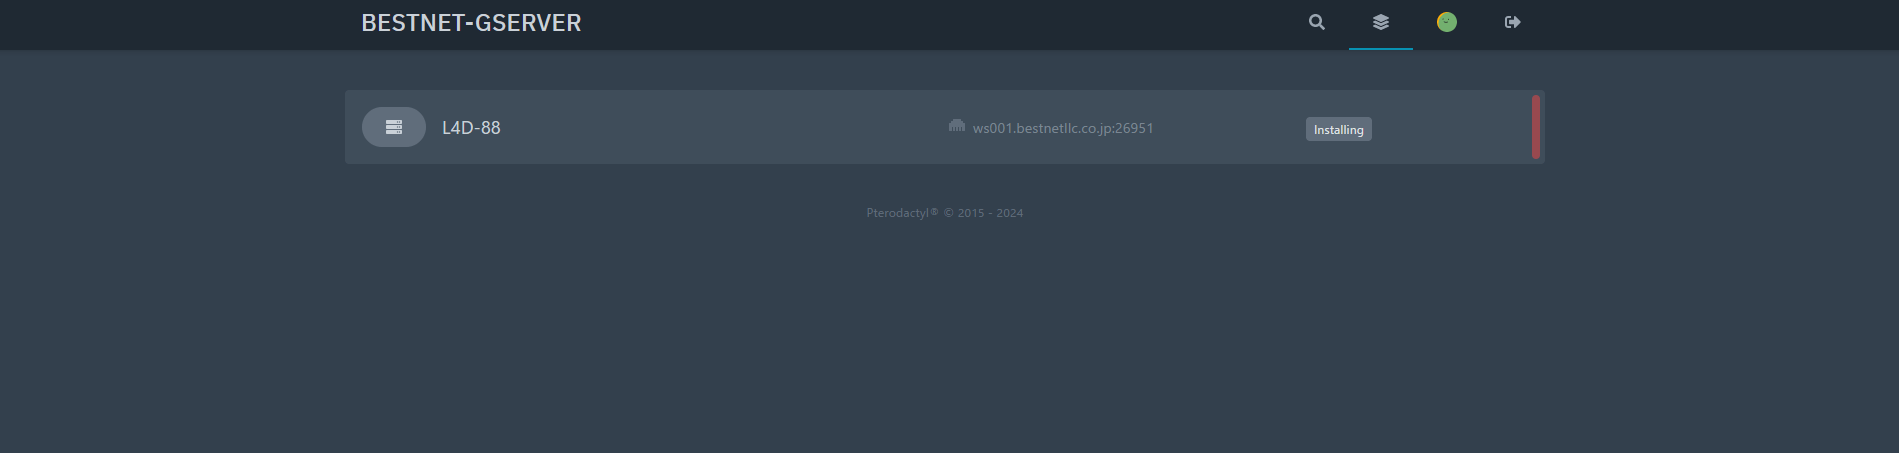
Upon login, the dashboard will be displayed as shown in the image below. If you have multiple servers under contract, they will all be displayed here for easy management.
Click on the game server displayed on the dashboard to view detailed information and perform various management tasks.
Viewing Detailed Information
Our game panel supports Japanese language display. For information on how to change the language, please see how to set up Japanese language here →.
Console Screen
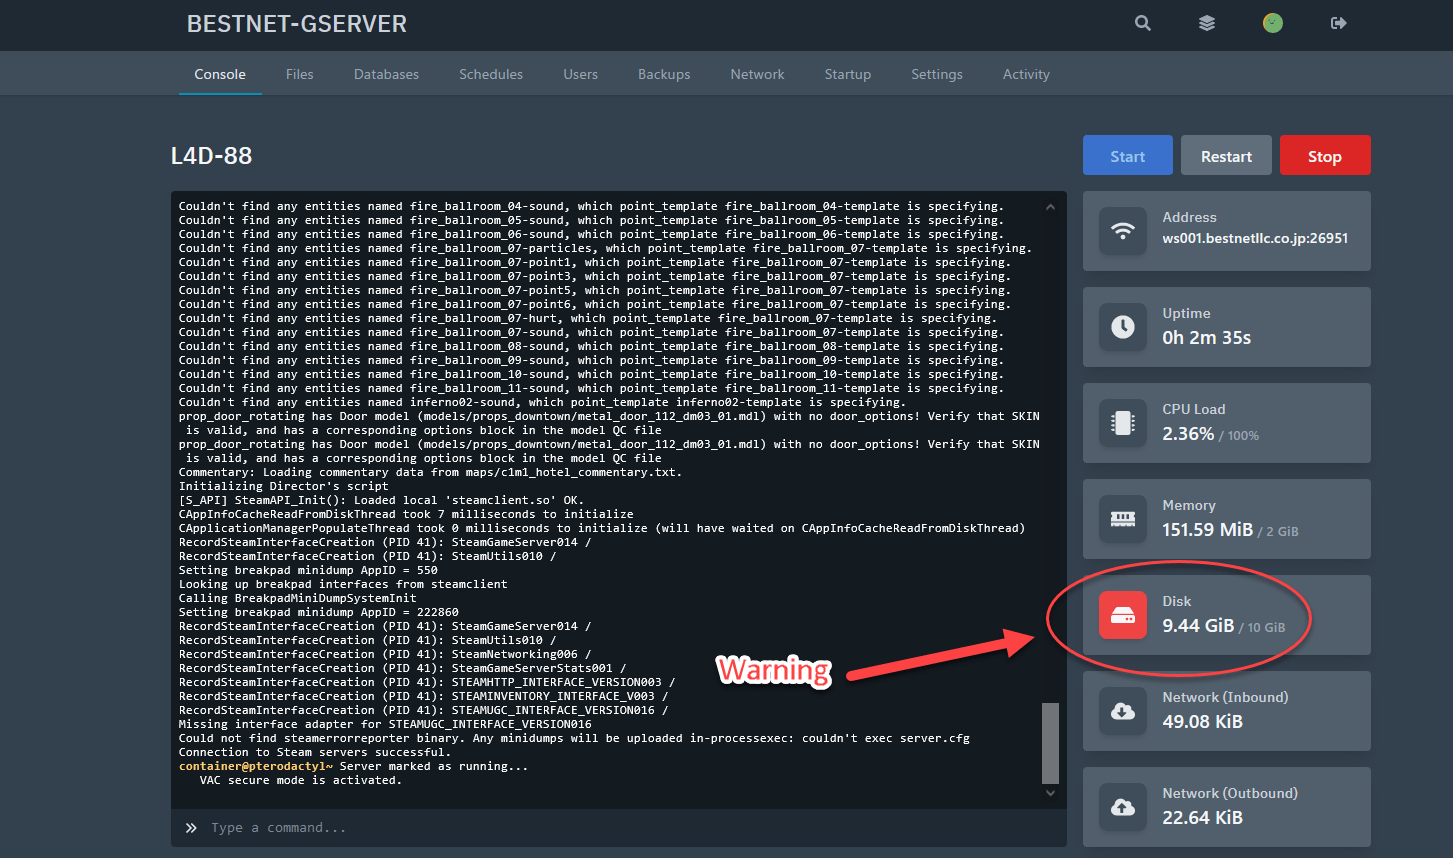
The console screen allows you to check the status of your game server. The interface is designed to be intuitive; however, when resources reach their limit, the resource icon will turn red.
File Browser
The file browser (file manager) lets you view and edit files directly within the server. Use it to modify configuration files, add mods, and more.
Basic Usage
Click a folder name to enter it. The breadcrumb at the top (Home > …) shows your current location. Use the (⋯) menu at the end of each row to perform actions on that file or folder. Click a text file name to open it in the editor.
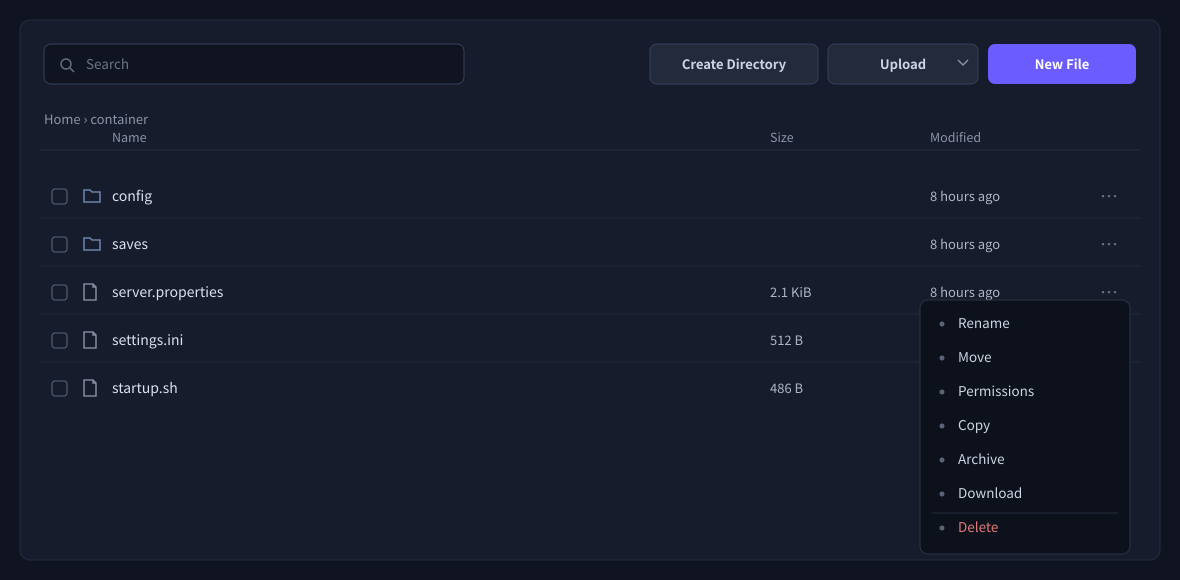
Here are the main operations available from the (⋯) menu:
- Rename: Change the filename.
- Copy: Creates a duplicate in the same folder. The name automatically becomes ‘◯◯ copy.extension’, and the original file remains intact.
- Download: Save the file to your local PC.
- Archive: Combine the selected file or folder into a single compressed file (.tar.gz). You can also extract the compressed file from the (⋯) menu.
- Permissions: Change the file’s access permissions. Usually not required.
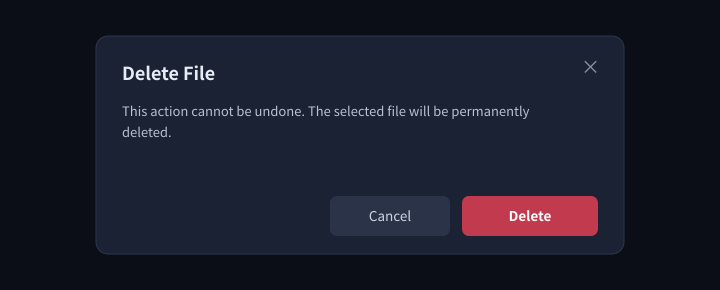
- Delete: Delete the file or folder (cannot be undone).
Create new / Upload: Use the buttons at the top (New File, Create Directory, Upload). Upload works on a per-file basis; you cannot upload entire folders.
Moving Files (Common Point of Confusion)
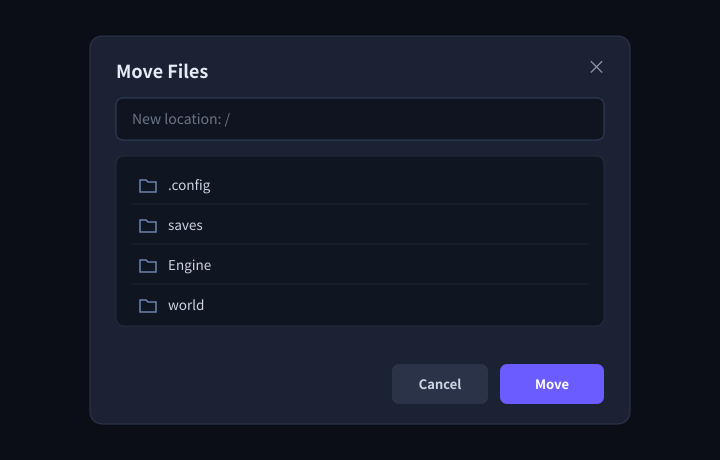
Select (⋯) > Move to open the destination selection screen. Here you specify the destination folder (location). Click through folders in the list to navigate, or type the destination path in the ‘New location’ field and click Move. The filename does not change. You can also drag and drop files onto a folder to move them.
When there’s a file with the same name (Important)
The behavior when a file with the same name exists in the destination or upload location varies by operation. This is a common source of confusion, so please check the diagram below.
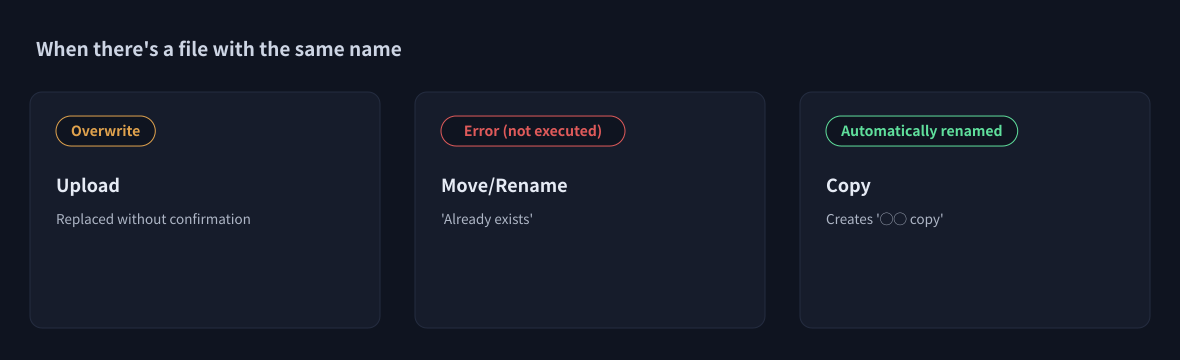
- Upload: Overwrites a file with the same name without confirmation. For important files, please create a backup in section 5.5 first.
- Move/Rename: If a file with the same name exists in the destination or target location, an ‘Already exists’ error occurs and the operation is not executed (the file is not overwritten). Delete the existing file first or change the name.
- Copy: Automatically receives an alternative name such as ‘◯◯ copy’, and the existing file is not overwritten.
Bulk Operations
Use the checkboxes on the left side of each row to select multiple files or folders. When selected, the buttons in the top right change to Archive, Move, and Delete, allowing you to perform bulk operations.

Schedule
The schedule feature allows you to set up recurring tasks, such as restarting the server every day at 4:00 AM.
Permission Group Management
This feature is useful if you want to manage your game server together with a friend. Enter the email address of the person you want to add, check the operations you want to allow, and click the “Invite” button. Our game panel will automatically send an invitation email.
Backup
You can create as many backup generations as your plan includes. Give the backup file a name and click the “Start Backup” button.
Automatically manage backup versions (Schedule)
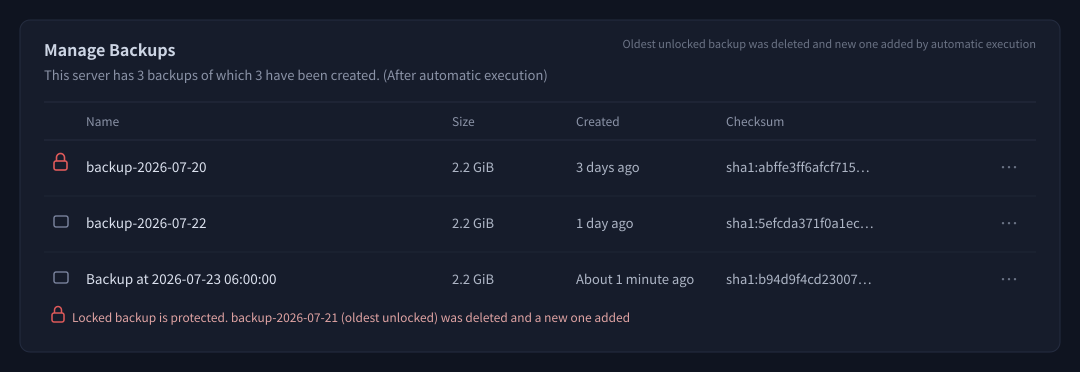
If you want to create new backups while automatically deleting the oldest ones and keeping a fixed number, use automatic backups via the Schedule feature. Even if you reach the limit, automatic backups via schedule will automatically delete the oldest backup and create a new one (the latest version is always maintained within your plan’s backup range).
Setup Steps
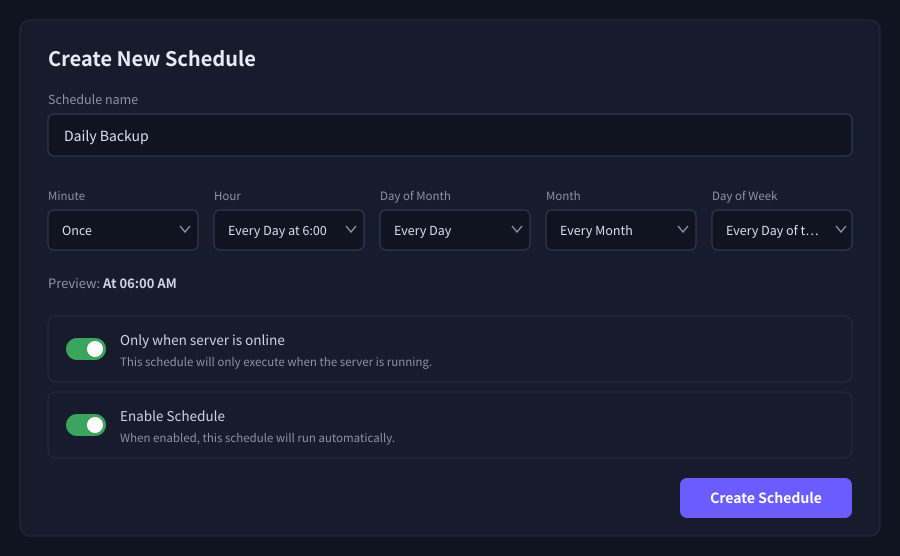
- Open ‘Schedules’ from the left menu and click ‘Create Schedule’.
- Set the schedule name and execution timing (example: minute=Once / hour=Every Day at 6:00 AM for daily at 6 AM). If you want to specify a custom time, switch to ‘advanced’ and enter in cron format.
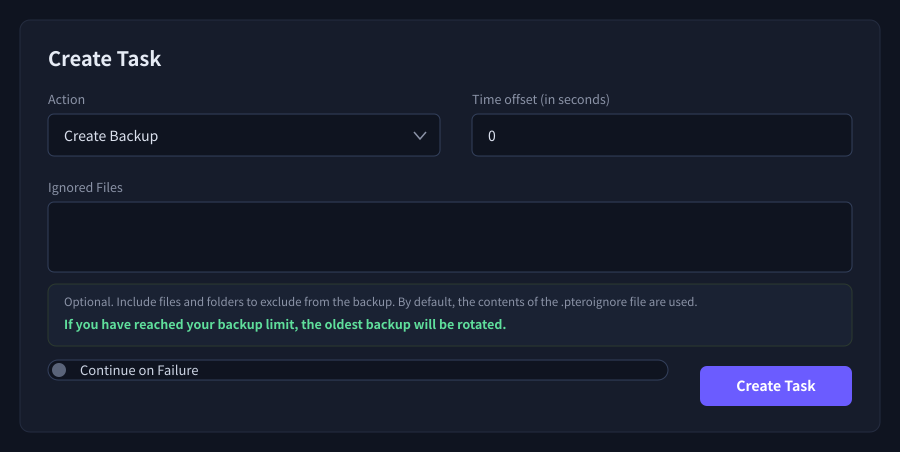
- After creation, open ‘Manage Schedules’ and click ‘New Task’.
- Select ‘Create Backup’ for the Action and save with ‘Create Task’ (if there are files to exclude, enter them in ‘Ignored Files’).
- At the specified time, backups are created automatically, and if the limit is reached, the oldest one is automatically replaced. If you want to check immediately, you can execute it on demand using ‘Run Now’ in the schedule details.
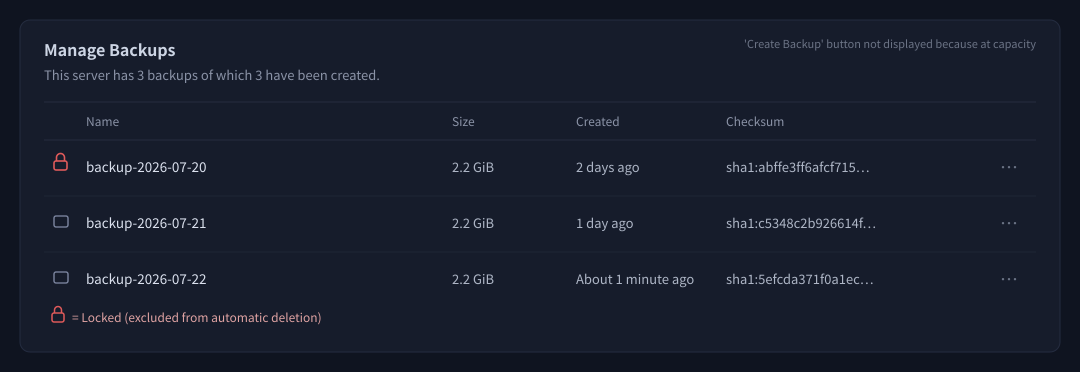
Protect backups you want to keep (Lock)
To protect important backups, select ‘Lock’ from the ‘…’ menu in the list, and they will be excluded from automatic deletion (rotation) (a lock icon will appear to the left of the name). *Locked backups also consume one storage slot. Be careful not to lock everything, as it will prevent automatic version rotation.
The number of backups you can save varies by your plan and game title, with higher plans allowing more. You can check the current limit from the Backup screen’s display ‘This server has X backups of which Y have been created.’ If you want to keep more versions, please consider upgrading to a higher plan.
Network
You can view the IP address and port number assigned to your game server. The port marked as “Primary” is the game port.
Startup
You can configure and view startup arguments (variables) when the server starts. Configuration details differ by game title.
Activity
You can view logs of various operations performed on your game server.
Settings
The Settings screen allows you to check SFTP connection information, server name, and debug information (node/server ID), and also reinstall your server.
Server Reinstallation (Reset)
The ‘Reinstall Server’ feature re-runs the installation script that was executed during the initial setup, returning your server to a near-initial state. When executed, the server will stop once, and some files may be deleted or modified during the process.
When to Use This
- When you want to reset your server to a clean initial state and start over (reset).
- When the server fails to start normally due to corrupted configuration files or similar issues, and you want to restore to the initial state and recover.
Operation Steps
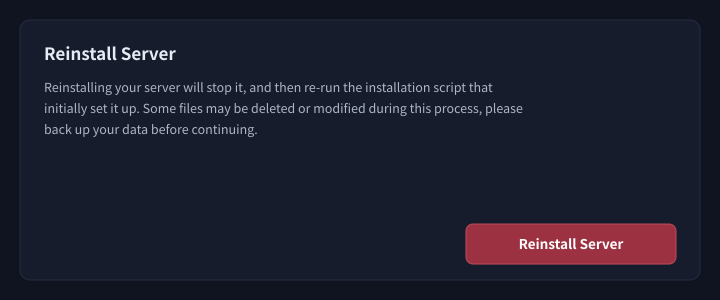
- Open ‘Settings’ from the left menu and scroll to ‘Reinstall Server’ in the lower right of the screen.
- Before executing, ensure you have backed up (see 5.5) or downloaded the necessary data.
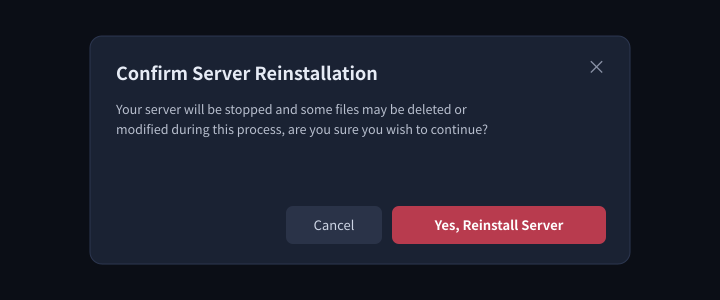
- Click the ‘Reinstall Server’ button and a confirmation screen will appear. Confirm the content, and if there are no issues, click ‘Yes, Reinstall Server’.
- Reinstallation will begin. It will take some time to complete (you can check the progress on the Console screen). Once complete, start your server.
Reinstallation Procedure When the Server Fails to Start
FTP Connection to Game Server
FTP connection is convenient for uploading MOD files and other content to your game server. Communication uses the SFTP method, which is encrypted, so you can use it securely.
Download FTP Client
There are no specific restrictions on which FTP client software you use, but we recommend FileZilla.
After downloading, proceed with the installation.
Enter Connection Information
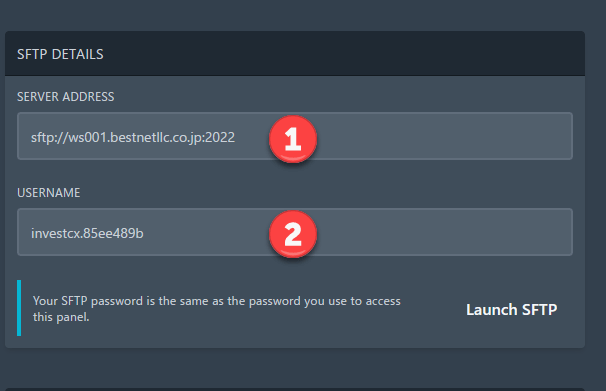
First, confirm the connection information in the “Settings” section of your game panel. Enter each item with reference to the image below.
- Host name: Copy and paste from the game panel
- Username: Copy and paste from the game panel
- Password: The password you use to log in to the game panel
After entering all information, click “Quickconnect”.

Upload Files
Once connected successfully, you can upload folders with multiple levels directly to your game server.
Account Security (Password & Two-Factor Authentication)
Your game panel login information can be managed anytime from the ‘Account’ section in the left menu. Here we explain how to change your login password and set up two-factor authentication (2FA). To protect your important game server from unauthorized login, we strongly recommend enabling two-factor authentication.
Changing Your Login Password
Open ‘Account’ from the left menu and click ‘Update Password’ on the right side to make changes.
- Enter your current password in the ‘Current Password’ field.
- Enter your new password in the ‘New Password’ field (8 characters or more; we recommend using a unique password not used on other services).
- Re-enter the same password in the ‘Confirm New Password’ field and click ‘Update Password’.
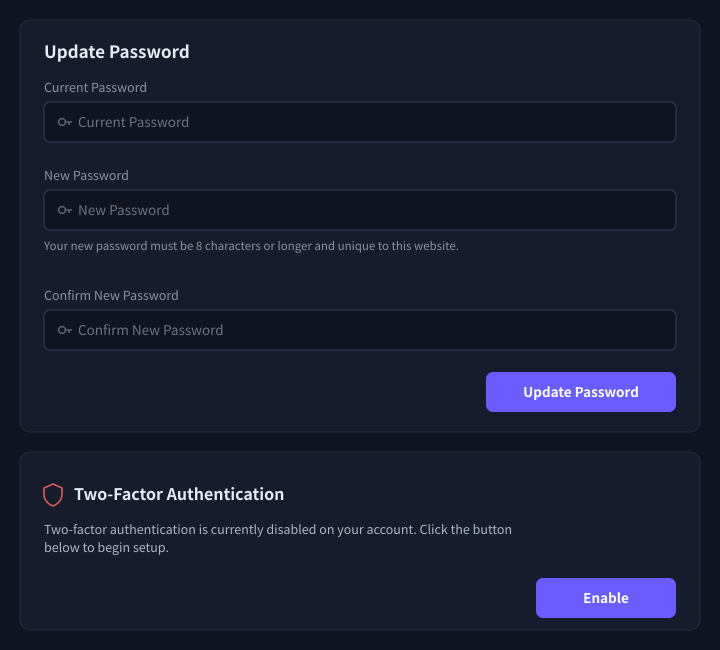
Setting Up Two-Factor Authentication (2FA)
When you enable two-factor authentication, you’ll need a 6-digit code from an authenticator app in addition to your password at login. Even if your password is compromised, it prevents unauthorized access.
What you’ll need in advance: An authenticator app on your smartphone (Google Authenticator, Microsoft Authenticator, Authy, etc.).
- In the ‘Two-Factor Authentication’ section on the ‘Account’ screen, click ‘Enable’.
- Scan the QR code displayed with your authenticator app (if you cannot scan the QR code, manually enter the character string key shown below).
- Enter the 6-digit code displayed in your authenticator app and your account password, then click ‘Enable’.
- After enabling, the recovery codes (emergency codes) that appear must be stored in a safe place. Use these codes to log in if you lose your smartphone or change devices.
