Contents
SETUP GUIDE
This guide explains with images the steps from the automatic server construction completion after your server application through connecting to the server with your game client.
Revision History
- v1.0
- August 2024 — Initial version
- v1.1
- February 2025 — Added server password confirmation section
- v2.0
- April 2026 — Complete revision following major game panel update. Manual query port assignment no longer required; all 78 detailed settings now operable from Japanese GUI. Server password can now be confirmed and changed from the Startup tab without JSON editing in file browser. Added guidance for reinstallation in case of startup failure
Prerequisites
Please log in to the game panel. For login instructions to the game panel, see Game Panel Login and Feature Overview →Wait for Installation to Complete
Once you complete your application and the service status becomes active, the game server installation will begin automatically.During installation, the server console displays “Installation in progress” and most information will not be visible. This screen typically completes in a few minutes, but may take tens of minutes depending on server load or if installation files are large.Once the server installation is complete, you will receive an installation completion message at your registered email address from our game panel system.Confirm Server Address and Port
You can confirm your server address and game port from the server console screen in the game panel. The “Server Address” and “Port” values displayed on the right side of the screen are required when connecting from the game.Each item can be automatically copied by clicking.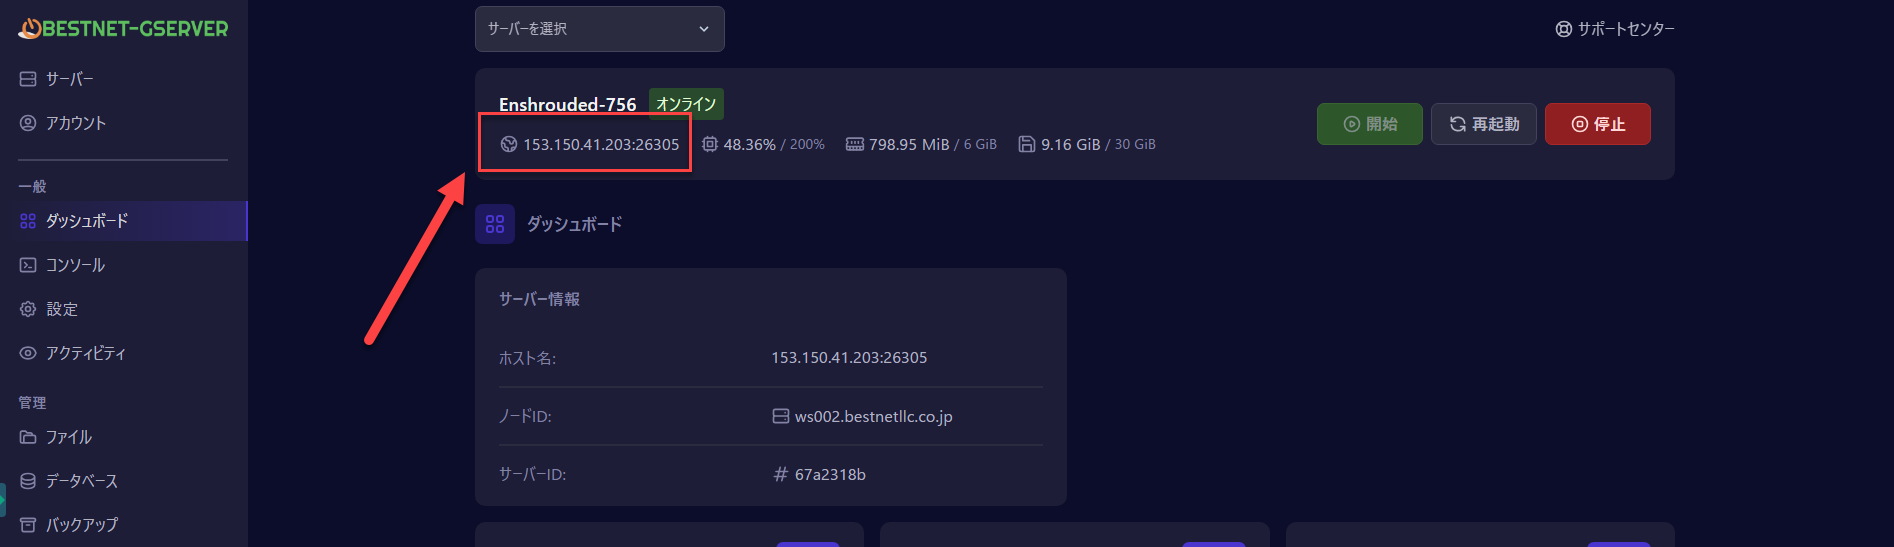
Confirm/Change Server Password
You can confirm and change the server password from the “Startup” tab in the left menu of the game panel. Unlike previous versions, there is no need to directly edit theenshrouded_server.json file.Open the “Startup” tab and locate the “Server Password” item in the variables list.
An auto-generated password is pre-filled as the default value.If you want to change to a different password, simply edit the input box and it will be saved automatically.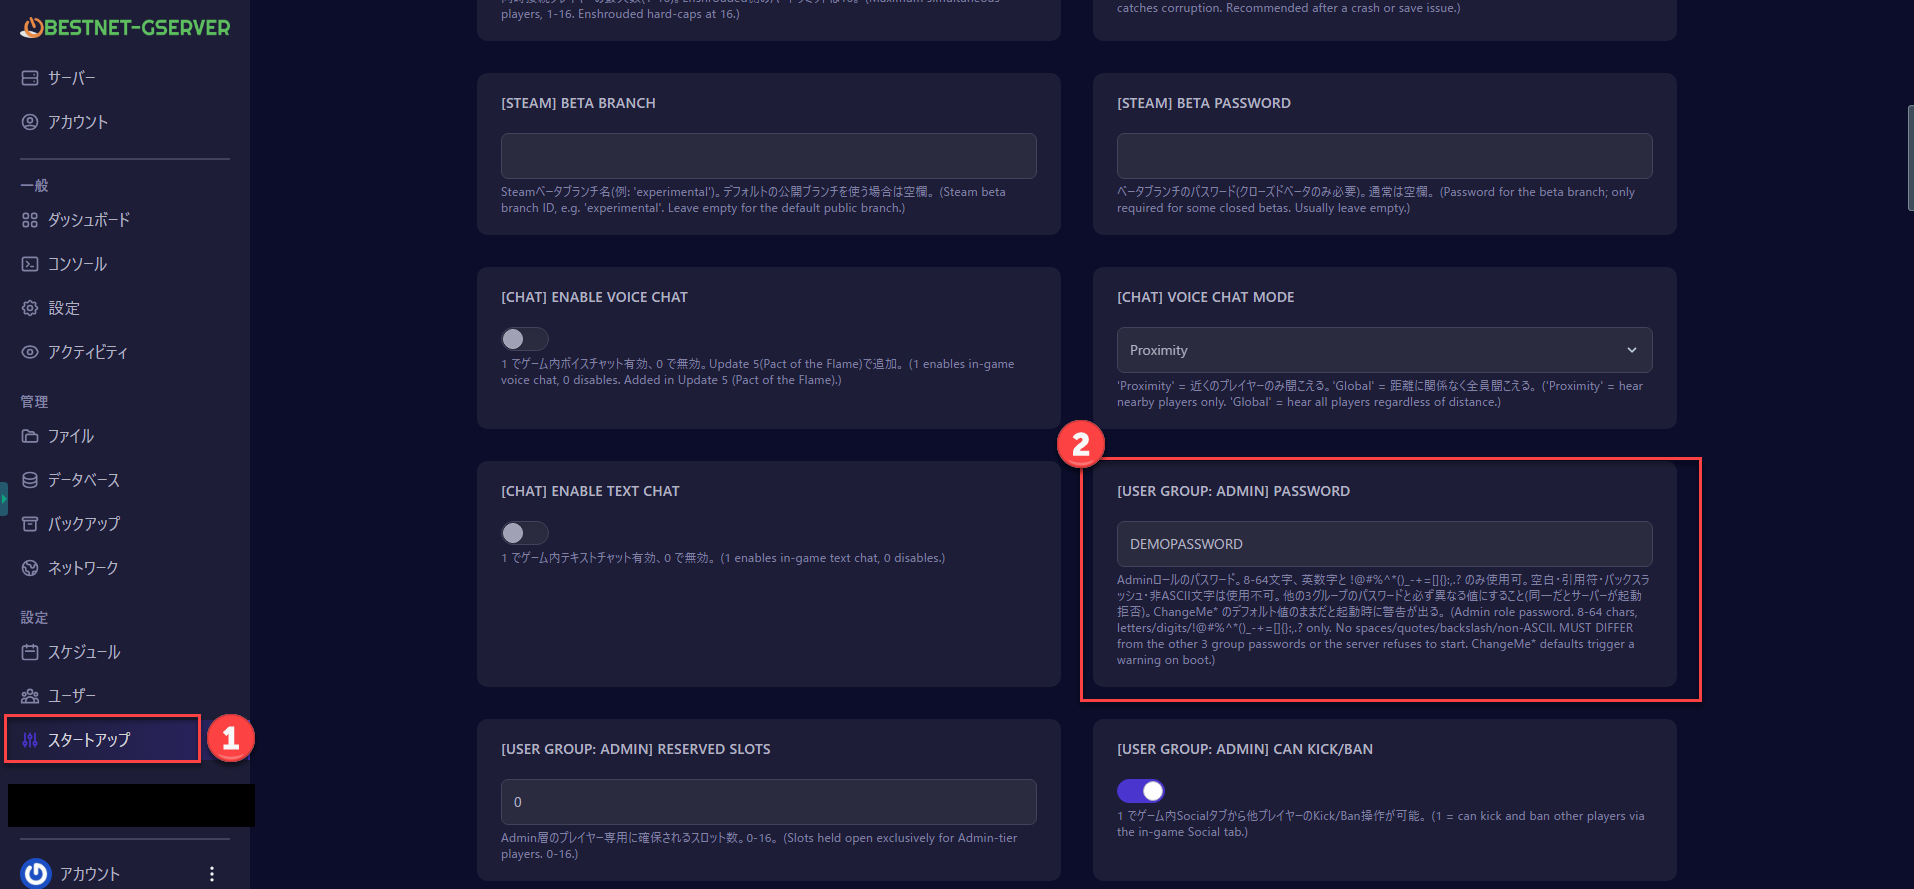
Password changes take effect after restarting the server.
Start the Server
Click the “Start” button in the upper right of the server console screen to start the server.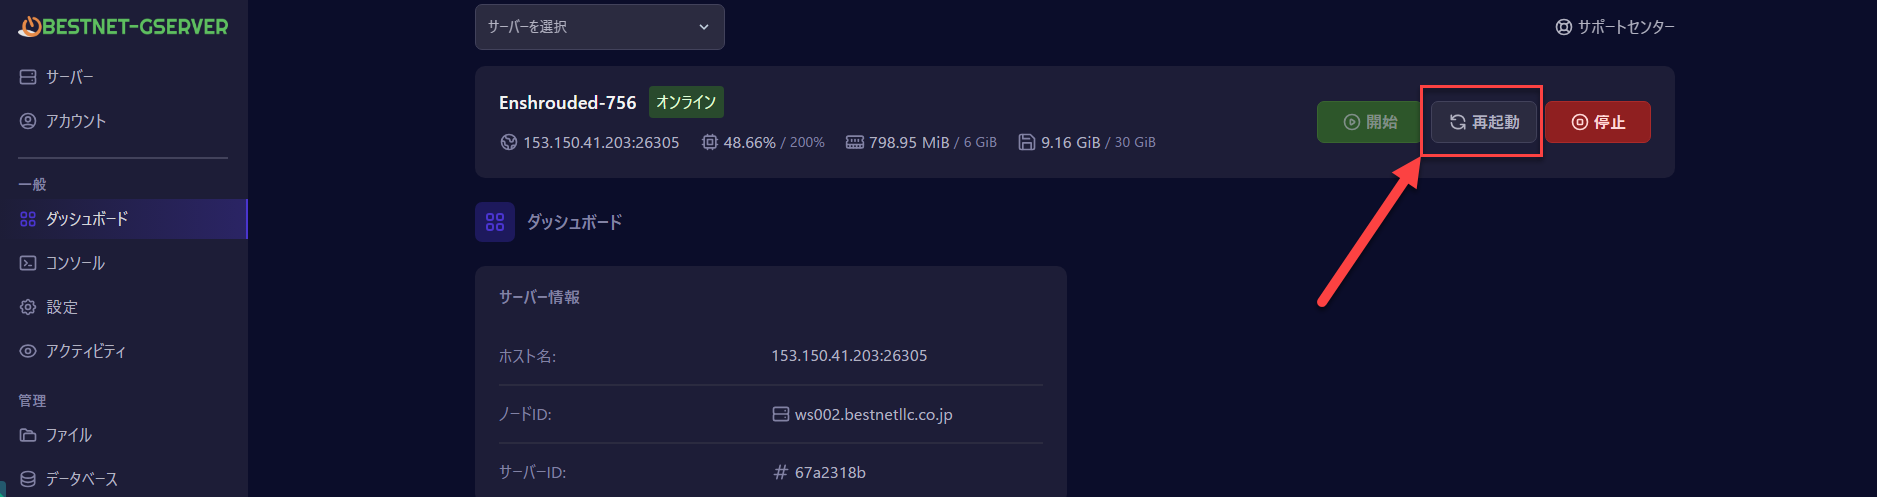
Connect from Game Client
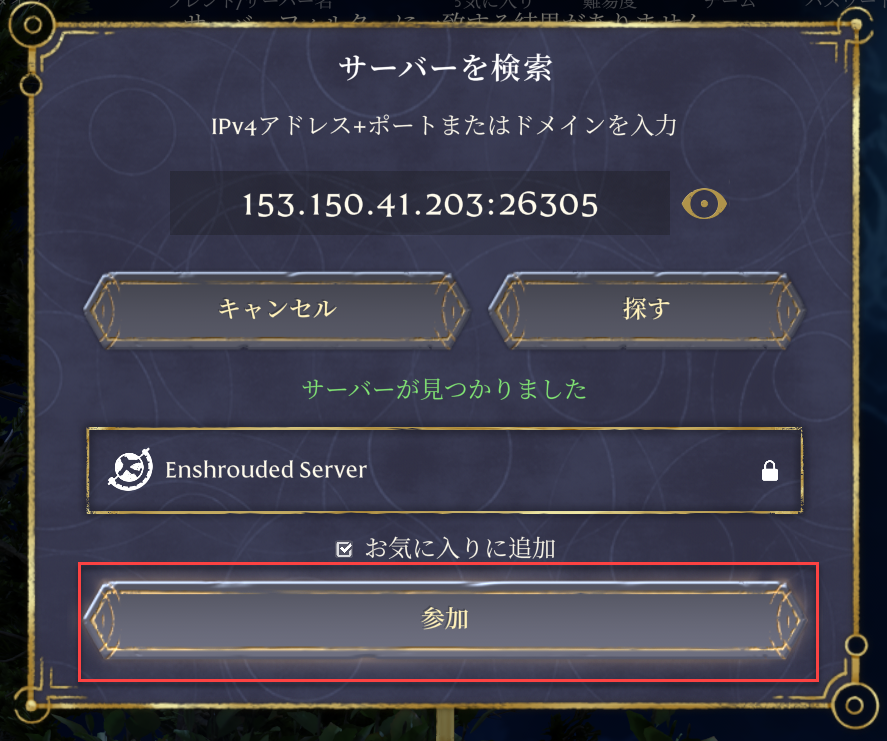
Launch “Enshrouded” from Steam and select “Multiplayer” from the main menu.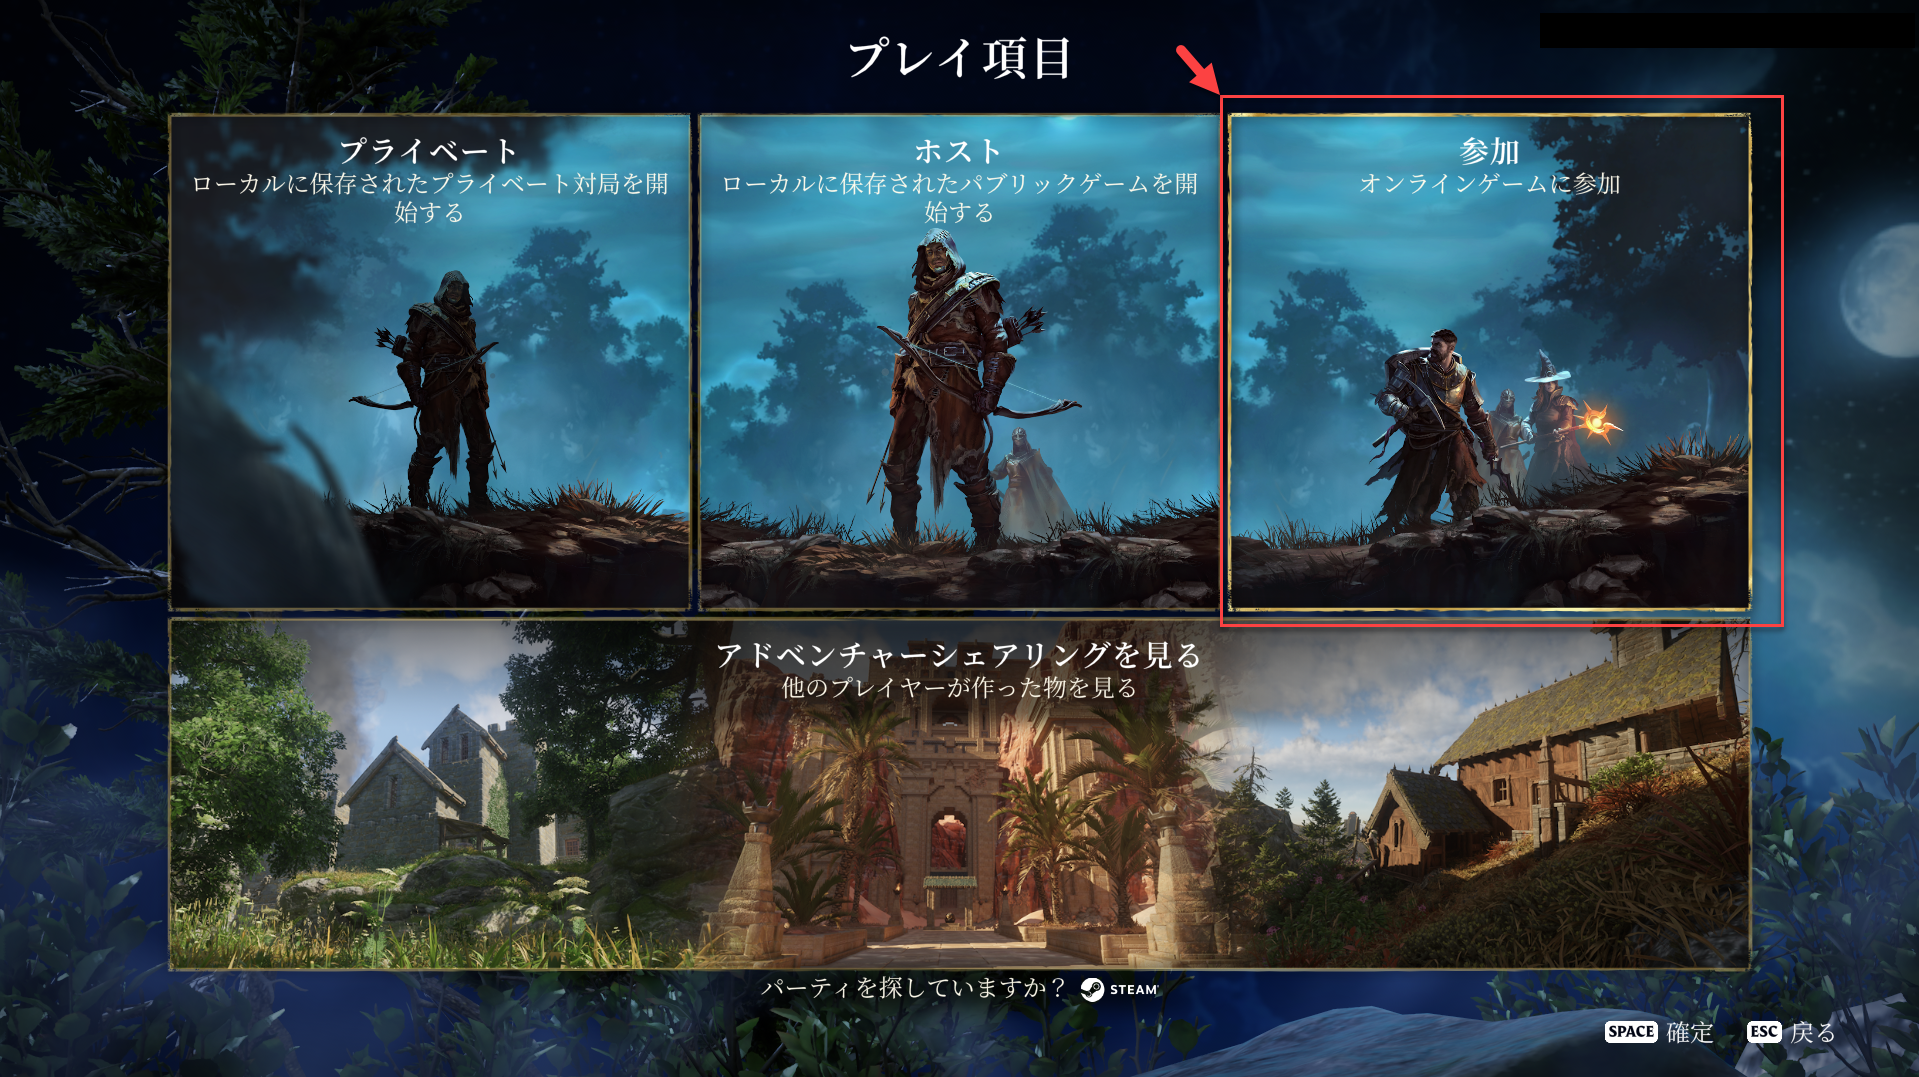

Troubleshooting Startup Failures
Very rarely, the initial setup immediately after ordering may not complete fully due to file distribution source (Steam) conditions, resulting in server startup failure.If the server does not start when the “Start” button is pressed, if startup attempts result in status returning to “Offline” within seconds to tens of seconds, or if the console displays
For specific reinstallation steps, see the following article.Server Reinstallation Steps When Server Won’t Start →If that does not resolve the issue, please reply to the support ticket automatically issued at the time of order, or open a new ticket from the Support Center.Init_Steamworks or Exit code: 3, running “Reinstall” from the game panel will almost certainly resolve the issue.Customize Detailed Settings
This article covers basic connection procedures only. The Enshrouded server features a total of 78 items across difficulty, permissions, chat, and basic server settings, all operable from the fully Japanese-localized game panel.Fine-tuning tailored to your community is possible, including player health multiplier, enemy damage multiplier, experience multiplier, and four-tier permission group management (Admin / Friend / Guest / Visitor).