
A quick-start guide to your BESTNET-GSERVER 7 Days to Die server — from ordering all the way to playing with friends. Your server is built automatically after you order, so no complicated setup is required.
Change log
- v1.0
- July 2026 — First edition
About this guide
This guide walks customers who have signed up for a 7 Days to Die multiplayer server with us through connecting and basic configuration.
Your server is built automatically after you order and delivered ready to play. There is no need to install server software or open ports. Game updates are applied automatically too, so you always play on the latest stable version.
This guide follows these steps: log in to the game panel → check the connection address → connect from the game → invite friends → change server settings.
Log in to the game panel
All server operations are done from the game panel. Login steps and the basics of the panel are covered in detail in a separate guide. If this is your first time, please read that first.
After logging in, open the 7 Days to Die server you just created from the server list. The rest of this guide assumes you have that server open.
Check the connection address (IP:Port)
Open the Network tab from the left menu of the server screen, and the address and ports assigned to your server are listed. The display looks like this (values are examples).
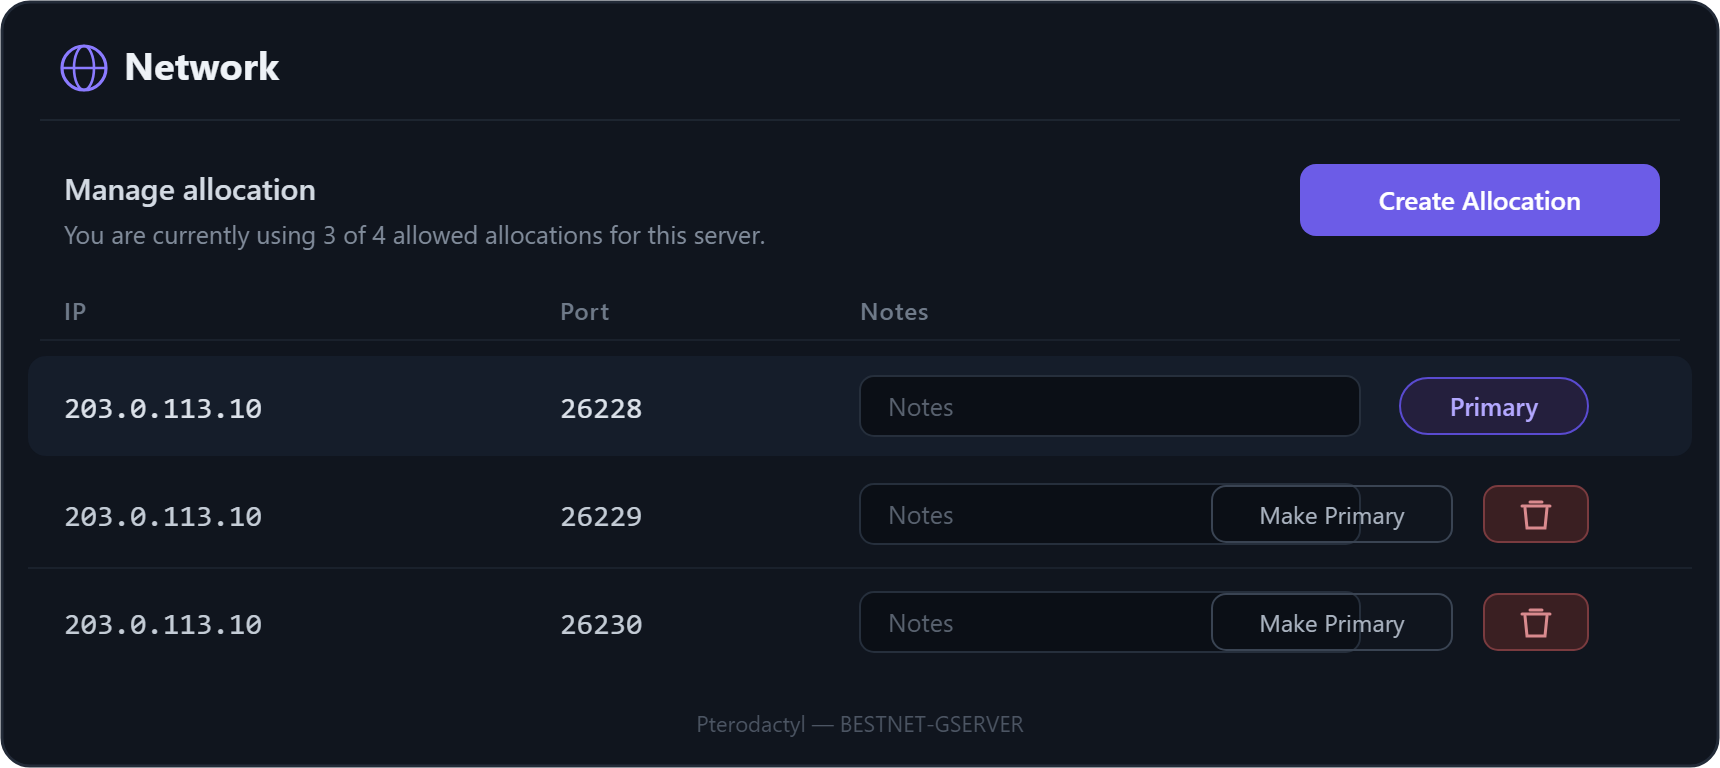
| Display | Role | What you do |
|---|---|---|
| Primary Allocation | Game port (the connection players join through) | Share this IP:Port with your friends |
| Additional Allocation ×3 | Internal traffic for Steam / cross-play | Works automatically. No need to share individually |
A 7 Days to Die server uses ports numbered consecutively after the game port for internal traffic (Steam and cross-play). We assign these together automatically when the server is created, so you do not need to configure ports yourself. The only thing to share with friends is the single Primary (game port).
Connect from 7 Days to Die
Once you know the connection address, connect from the game.
Connect directly by IP (recommended)
- Launch 7 Days to Die and click “Join a Game” on the main menu.
- When the search screen opens, click “Start Search” at the bottom right to proceed.
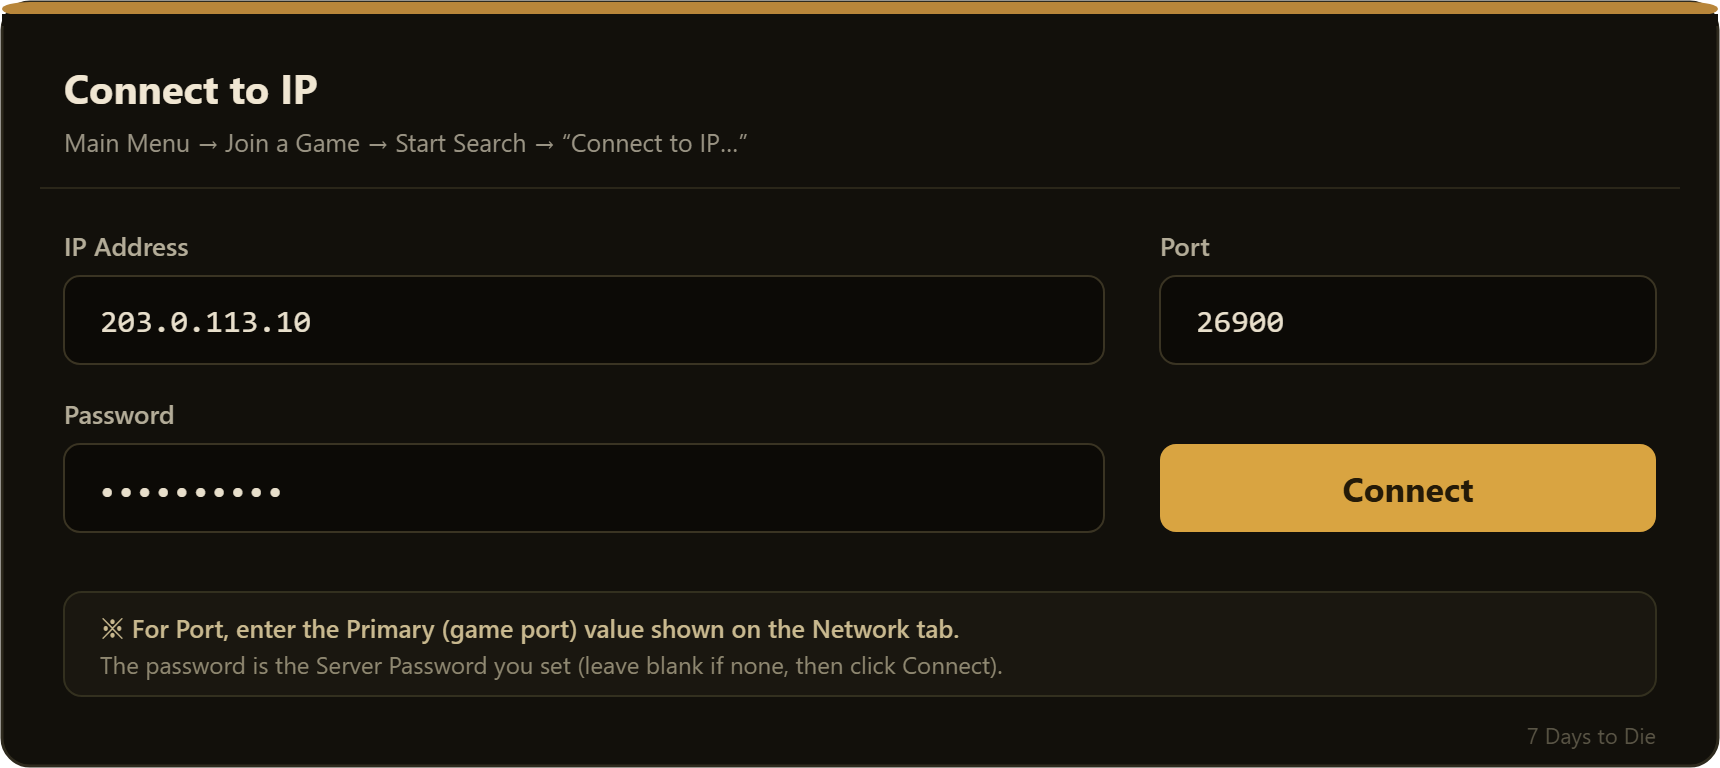
- Click “Connect to IP” at the bottom right of the list screen.
- Enter the address you found on the Network tab in “IP”, and
26900(the value shown for you) in “Port”, then click “Connect”. - When the password field appears, enter the server password and click “Submit”.
Once the world loads and appears on screen, you are connected.
Find it from the server browser
If your server visibility is set to public, it appears by name in the “Join a Game” list. Typing the server name in the search box at the top makes it easier to find. If it does not appear, use “4.1 Connect directly” above.
Invite your friends
Share the following two things with your friends.
- Connection address: the
IP:Portof the Primary (game port) on the Network tab - Server password: the value of “[SERVER] Server Password” on the Startup tab
Your friends join with the same steps as “4.1 Connect directly by IP”.
Change server settings
The server name, password, difficulty and more can be changed from the Startup tab of the game panel. The main settings are as follows.
| Setting (Startup tab) | Description |
|---|---|
| [SERVER] Server Name | The name shown in the server browser |
| [SERVER] Server Password | Password to join (leave blank to allow anyone) |
| [SERVER] Server Visibility | Visibility (0=hidden / 1=friends only / 2=public) |
| [SERVER] Max Players | Maximum concurrent players |
| [GAME] Difficulty | Difficulty (0=easy … 5=hard) |
Console tab to apply them. Changes are not applied while the server is running.The slot count (maximum concurrent players) is a guideline for recommended concurrency. It varies with world size, number of structures, mods and so on. It is not a guaranteed value, so please understand this in advance.
About cross-play
Our servers are provided with a port configuration that supports cross-play across PC, PlayStation and Xbox.
The anti-cheat feature (“[SECURITY] EasyAntiCheat” on the Startup tab) is enabled by default. Change it as needed, for example when installing mods.
Restart & backup
Restart / stop / start
From the Console tab of the game panel you can restart, stop and start the server. Try a restart after changing settings or if behavior becomes unstable.
Backup
From the Backups tab you can back up and restore server data. We recommend backing up before major changes and on a regular basis. The number of generations you can keep depends on your plan.
Updates
Game updates are applied automatically. No update work is needed on your side. Note that when the server is updated, joining friends may also need to update their game to the same version.
When you cannot connect
If you cannot connect or the server is not found, please check the following in order.
- Matching versions — Do the server and all players share the same game version? After a server update, please have players update too.
- Server status — Is the server status shown as “Running” in the game panel?
- Wait after startup — Right after creation or a restart, world generation and registration take a few minutes. Please wait a little and try again.
- Check the address — Are you entering the IP and port of the Primary (game port) on the Network tab correctly? Watch out for typos.
- Password — Does your input match “[SERVER] Server Password” on the Startup tab?
- Visibility — To show it in the server browser, is “[SERVER] Server Visibility” set to “2 (public)”?
If this still does not resolve the issue, contact the support desk below with your server name and game port number.
Support
For technical questions, please submit a request from the support ticket in the customer portal →. Our Japanese engineers will assist you. Within business hours we generally reply within 24 hours.


