目次
- How to Set Up Voice Chat on Minecraft Server (Forge)
- STEP1.Download the Simple Voice Chat mod.
- STEP2.Log in to the game panel.
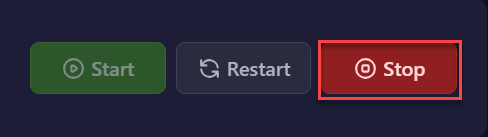
- STEP3.Click "Stop" in the top right of the item in "Dashboard".
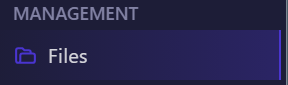
- STEP4.Select [Files] from the left menu.
- STEP5.Open the mods folder.
- STEP6.Upload the .jar file from step 1.
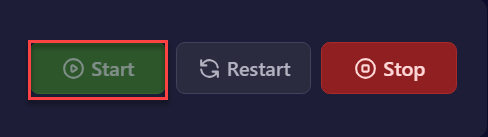
- STEP7.Return to "Dashboard" and start the server with the "Start" button.
- STEP8.Once the server is fully booted, stop the server.
- STEP9.Go to the [Network] tab on the left.
- STEP10.Note the available port depending on your server type. Budget Servers: Select a port not used by other MODs.
- STEP11.Premium Server/Dedicated IP: Create a port for the MOD to use.
- STEP12.Select [Files] from the left menu.
- STEP13.Find the following directory. /home/container/config/voicechat
- STEP14.Open voicechat-server.properties for editing.
- STEP15.At the port= line, change the value to the port from step 10.
- STEP16.Select [SAVE CONTENT] in the bottom right.
- STEP17.Return to "Dashboard" and start the server with the "Start" button.
- How to Set Up Voice Chat on Minecraft Server (Fabric)
- STEP1.Download the Simple Voice Chat mod.
- STEP2.Log in to the game panel.
- STEP3.Click "Stop" in the top right of the item in "Dashboard".
- STEP4.Select [Files] from the left menu.
- STEP5.Open the mods folder.
- STEP6.Upload the .jar file from step 1.
- STEP7.Return to "Dashboard" and start the server with the "Start" button.
- STEP8.Once the server is fully booted, stop the server.
- STEP9.Go to [Network] on the left.
- STEP10.Note the available port depending on your server type. Budget Servers: Select a port not used by other MODs.
- STEP11.Premium Server/Dedicated IP: Create a port for the MOD to use.
- STEP12.Select [Files] from the left menu.
- STEP13.Find the following directory. /home/container/config/voicechat
- STEP14.Open voicechat-server.properties for editing.STEP15.At the port= line, change the value to the port from step 10.
- STEP16.Select the [SAVE CONTENT] button in the bottom right.
- STEP16.Return to "Dashboard" and start the server with the "Start" button.
- How to Set Up Voice Chat on Minecraft Server (Spigot/PaperMC)
- STEP1. Download Simple Voice Chat.
- STEP2.Log in to the game panel.
- STEP3.Click "Stop" in the top right of the item in "Dashboard".
- STEP4.Select [Files] from the left menu.
- STEP5.Open plugins.
- STEP6.Upload the .jar file from step 1.
- STEP7.Return to "Dashboard" and start the server with the "Start" button.
- STEP8.Once the server is fully booted, stop the server.
- STEP9.Go to the [Network] tab on the left.
- STEP10.Note the available port depending on your server type. Budget Servers: Select a port not used by other MODs.
- STEP11.Premium Server/Dedicated IP: Create a port for the MOD to use.
- STEP12.Select [Files] from the left menu.
- STEP13.Find the following directory. /home/container/plugins/voicechat
- STEP14.Open voicechat-server.properties for editing.
- STEP15.port= At the line, change the value to the port from step 10.
- STEP16.Select the [SAVE CONTENT] button in the bottom right.
- STEP17.Return to "Dashboard" and start the server with the "Start" button.
| Note | The Minecraft client must also have the voice chat MOD installed. For Spigot/PaperMC servers, players must use Forge/Fabric/Quilt versions. |
How to Set Up Voice Chat on Minecraft Server (Forge)
STEP1.Download the Simple Voice Chat mod.
STEP2.Log in to the game panel.
STEP3.Click “Stop” in the top right of the item in “Dashboard”.
STEP4.Select [Files] from the left menu.
STEP5.Open the mods folder.

STEP6.Upload the .jar file from step 1.
STEP7.Return to “Dashboard” and start the server with the “Start” button.
STEP8.Once the server is fully booted, stop the server.
STEP9.Go to the [Network] tab on the left.

STEP10.Note the available port depending on your server type.
Budget Servers: Select a port not used by other MODs.
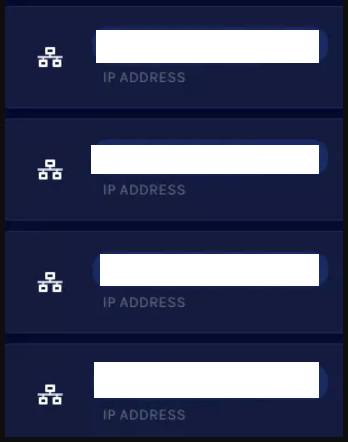
STEP11.Premium Server/Dedicated IP: Create a port for the MOD to use.

STEP12.Select [Files] from the left menu.
STEP13.Find the following directory.
/home/container/config/voicechat

STEP14.Open voicechat-server.properties for editing.

STEP15.At the port= line, change the value to the port from step 10.

STEP16.Select [SAVE CONTENT] in the bottom right.

STEP17.Return to “Dashboard” and start the server with the “Start” button.
How to Set Up Voice Chat on Minecraft Server (Fabric)
STEP1.Download the Simple Voice Chat mod.
STEP2.Log in to the game panel.
STEP3.Click “Stop” in the top right of the item in “Dashboard”.
STEP4.Select [Files] from the left menu.
STEP5.Open the mods folder.
STEP6.Upload the .jar file from step 1.
STEP7.Return to “Dashboard” and start the server with the “Start” button.
STEP8.Once the server is fully booted, stop the server.
STEP9.Go to [Network] on the left.
STEP10.Note the available port depending on your server type.
Budget Servers: Select a port not used by other MODs.
STEP11.Premium Server/Dedicated IP: Create a port for the MOD to use.
STEP12.Select [Files] from the left menu.
STEP13.Find the following directory.
/home/container/config/voicechat

STEP14.Open voicechat-server.properties for editing.
STEP15.At the port= line, change the value to the port from step 10.
STEP16.Select the [SAVE CONTENT] button in the bottom right.
STEP16.Return to “Dashboard” and start the server with the “Start” button.
How to Set Up Voice Chat on Minecraft Server (Spigot/PaperMC)
STEP1. Download Simple Voice Chat.
STEP2.Log in to the game panel.
STEP3.Click “Stop” in the top right of the item in “Dashboard”.
STEP4.Select [Files] from the left menu.
STEP5.Open plugins.

STEP6.Upload the .jar file from step 1.
STEP7.Return to “Dashboard” and start the server with the “Start” button.
STEP8.Once the server is fully booted, stop the server.
STEP9.Go to the [Network] tab on the left.
STEP10.Note the available port depending on your server type.
Budget Servers: Select a port not used by other MODs.
STEP11.Premium Server/Dedicated IP: Create a port for the MOD to use.
STEP12.Select [Files] from the left menu.
STEP13.Find the following directory.
/home/container/plugins/voicechat
STEP14.Open voicechat-server.properties for editing.
STEP15.port= At the line, change the value to the port from step 10.
STEP16.Select the [SAVE CONTENT] button in the bottom right.
STEP17.Return to “Dashboard” and start the server with the “Start” button.