Contents
SETUP GUIDE
This guide walks you through the initial setup steps for your RuneScape: Dragonwilds dedicated server, from purchase to joining the server. The process takes just a few minutes. The "Owner ID" configuration is a mandatory step that must be completed first—without it, no one can join the server.
Revision History
- v1.0
- June 2026 — Initial version created
Process After Purchase and Logging Into the Game Panel
Once payment is complete, your server is automatically built and provided ready to use. When construction is complete, we will send you an email containing the game panel URL, login credentials, and server connection information (world name, etc.).First, log into the game panel to verify your server status.- Log into the game panel using the URL and login credentials provided in the email.
- Open your RuneScape: Dragonwilds server from the server list.
- Confirm that the server status in the "Console" tab shows "Running" (green).
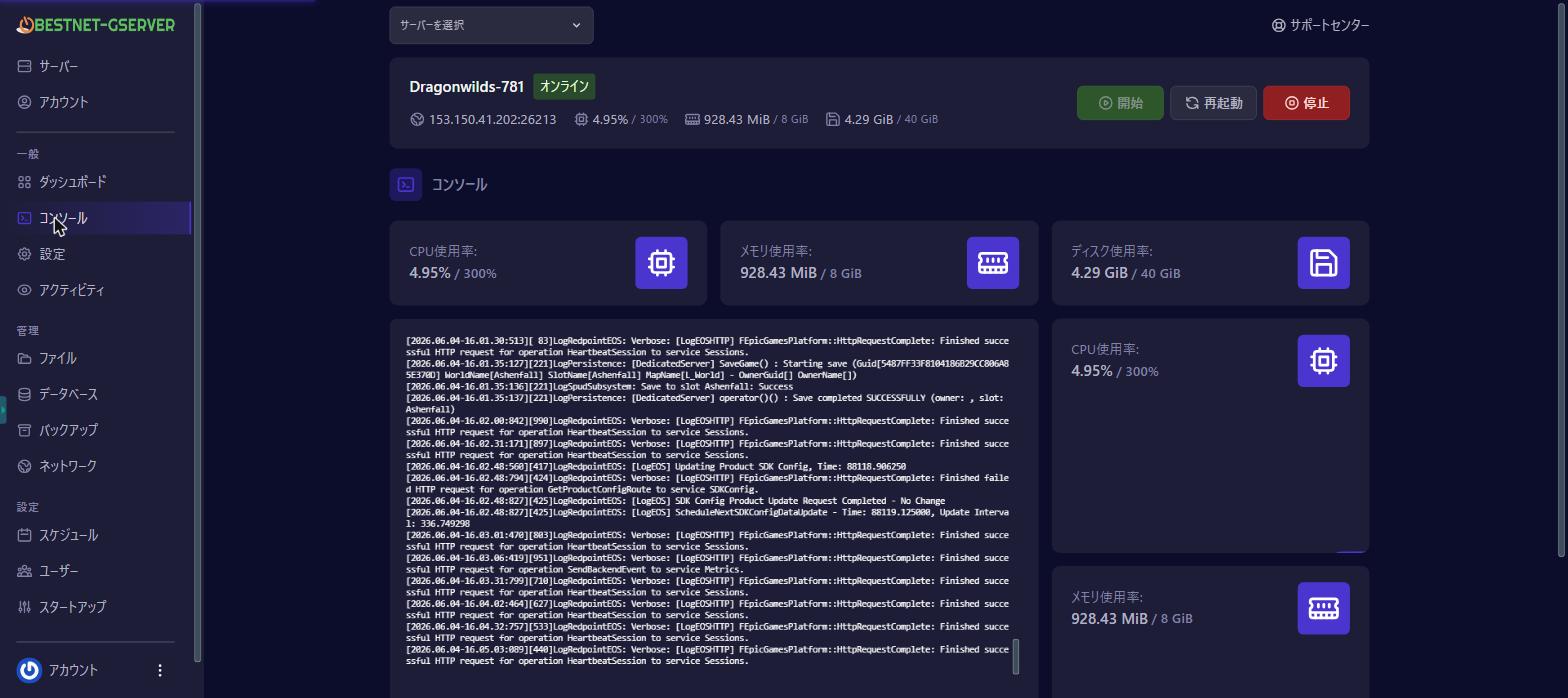
While the Owner ID is not configured, even if the server shows "Running," no one—including you—can join (neither through the server browser nor direct IP connection). This is a game-side requirement. You must set this first.
For basic game panel usage, see Game Panel Login and Feature Overview →
Step 1: Confirm Your Player ID In-Game
The Owner ID uses the in-game Player ID of the server owner (typically yourself). You can find your Player ID by launching the game and following these steps.- Launch RuneScape: Dragonwilds.
- Open the Settings menu.
- Your "My Player ID" will be displayed at the very bottom of the settings screen.
- Use the copy button to copy your Player ID.
1a2b3c4d5e6f7a8b9c0d1e2f3a4b5c6d.Your Player ID is unique to your account. Have the person who should own the server (the contract holder or administrator) view and copy it in-game. Saving it to your phone or notes will make pasting it easier in the next step.
Step 2: Configure Owner ID in the Game Panel
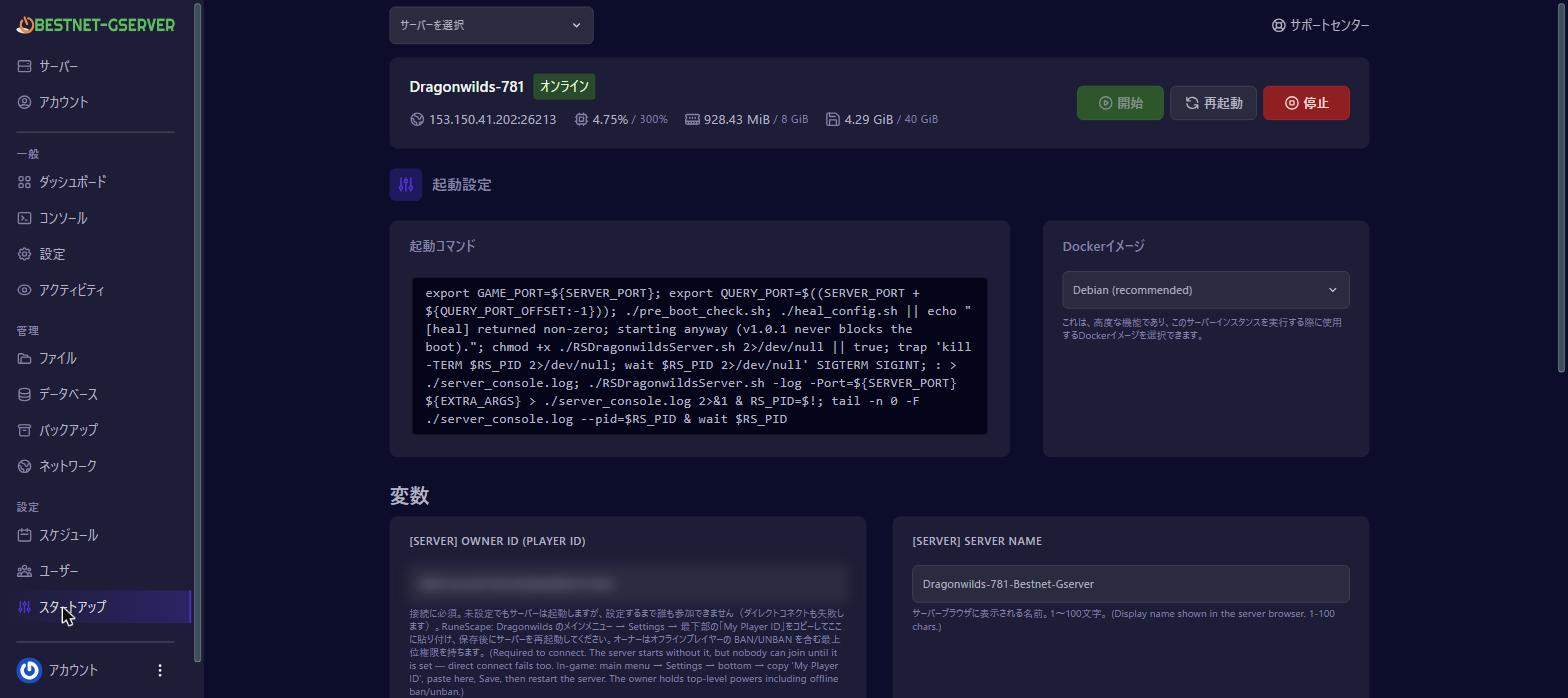
Paste the Player ID you copied into the game panel as your server's "Owner ID."- Open your server in the game panel and select the "Startup" tab from the left menu.
- In the configuration options, find "Owner ID" and paste the Player ID you copied in Step 1 into the input field. Save the changes.
- Open the "Console" tab and click "Restart" to restart the server.
Always restart the server after entering the Owner ID. The configuration will not take effect until you restart.
When joining, the owner is verified by the Player ID match, not the owner name displayed in-game. If the owner name appears blank in the panel but the Owner ID is correctly set, joining will work without issue.
Step 3: Join Your Server
Once your Owner ID is configured, you can join using one of the two methods below. The same methods apply when inviting friends—simply share your world name (for public browser) or IP:port (for direct connection). If your server is set to private, also share the world password. Both methods require that the Owner ID be configured first.Method A: Search by World Name in the Public Browser
- Open the "Worlds" screen from the in-game menu.
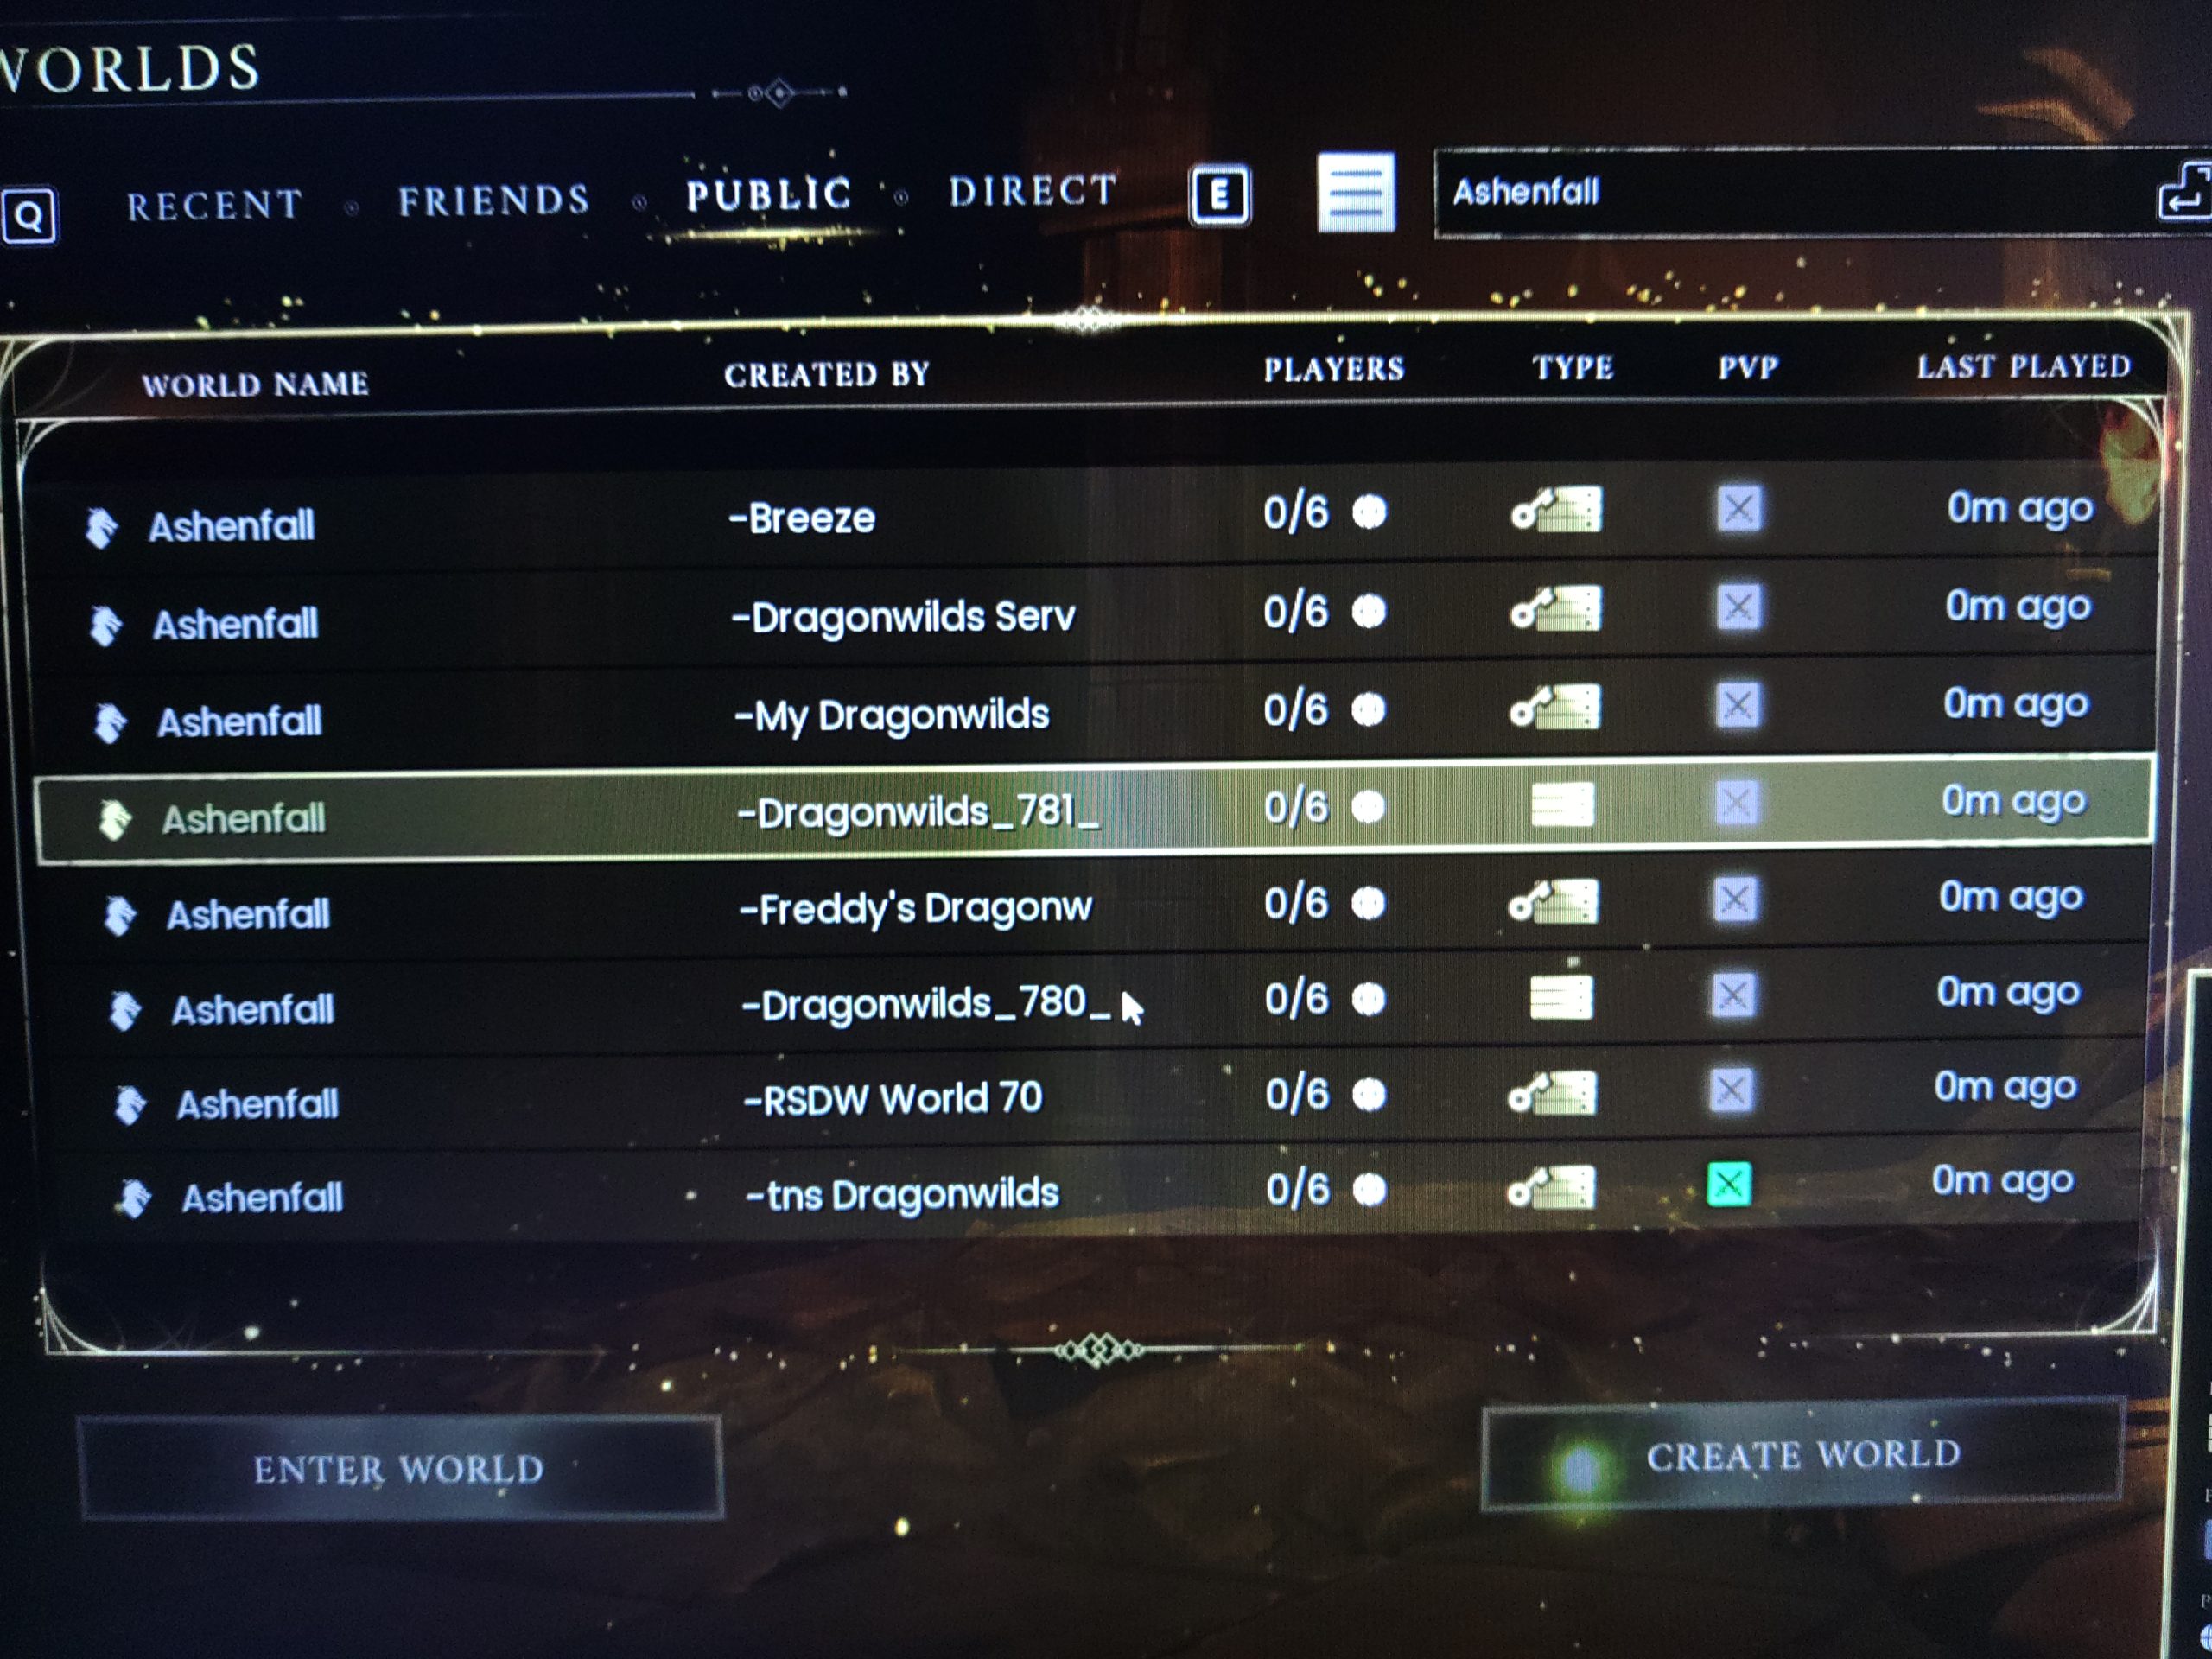
- Select the "PUBLIC" tab at the top.
- Enter your world name in the search box at the top right. Your world name is provided in the setup email.
- Your server will appear in the list. Look for your server by the "CREATED BY" column, which displays the server name.
- Click "ENTER WORLD" to join.
World name searches are case-sensitive. Enter the world name exactly as shown in your setup email. Note that many servers retain the default name "Ashenfall," so searching for "Ashenfall" will return many results. Searching for your unique world name is more reliable.
Method B: Join Via Direct Connection (IP Address)
You can also join directly by specifying your server's IP address and port number.- Open your server in the game panel and check the "Network" tab. The
IP address:port numbershown under "Primary Allocation" (for example,153.150.41.203:26213) is your server's connection address. - In-game, open "Worlds" → "DIRECT" tab.
- Enter the
IP address:port numberto connect.
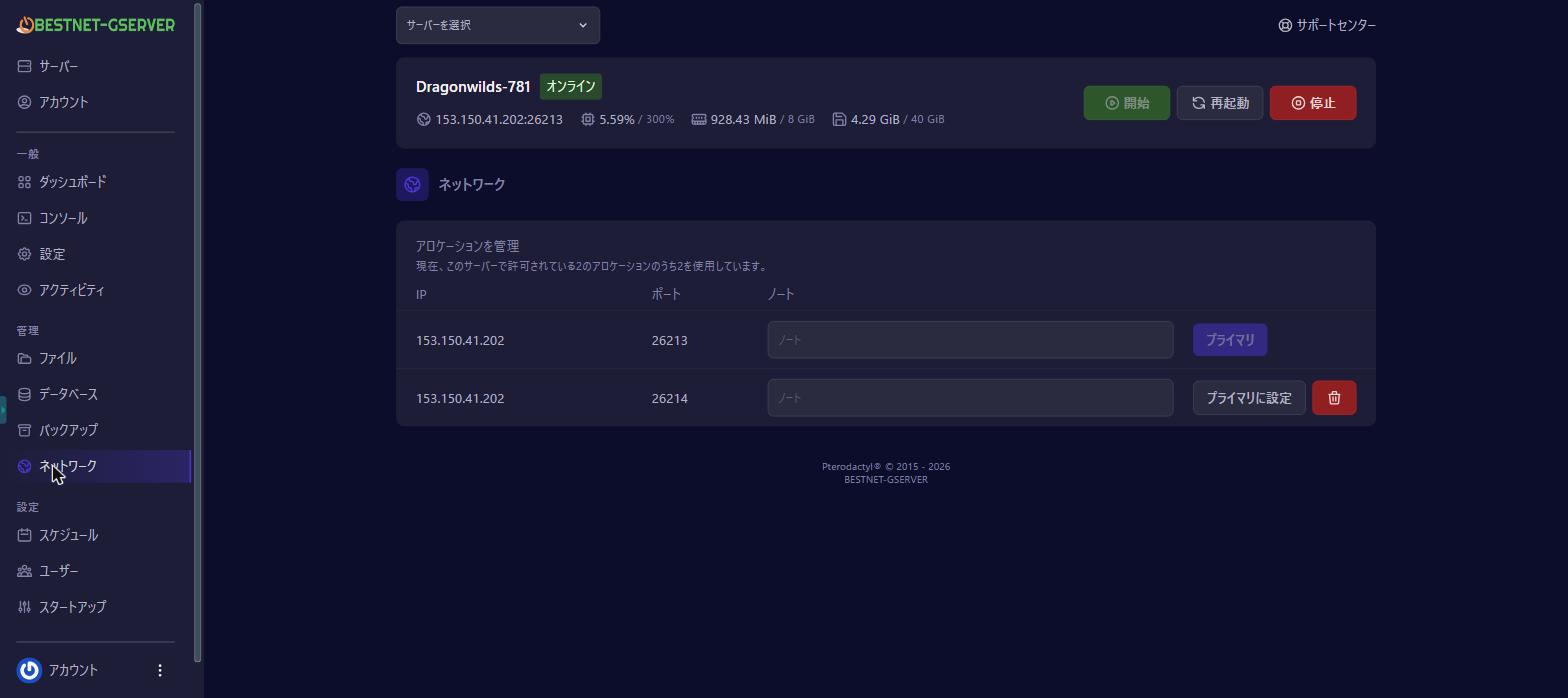
The port number changes with each server build depending on available ports on our infrastructure. Always check the current value in the "Network" tab.
Server Configuration—Review and Optional Changes
Your server comes pre-configured with a unique world name and server name (provided in your setup email). Maximum concurrent players depends on your service plan. As needed, you can configure the following passwords from the "Startup" tab of the game panel. Changes take effect after a server restart.World Password (Public / Private Toggle)
If you leave the World Password blank, your server will be public and anyone who finds your world name can join. To restrict access, set a password in the "World Password" field on the "Startup" tab. Share this password along with the connection information to your participants.Admin Password (Delegate Server Management)
When you share the Admin Password with trusted teammates, they can perform server management actions in-game. The server owner retains the highest privileges, including ban/unban authority over offline players.Troubleshooting Connection Issues
If you cannot join, check the following in order.- Is your Owner ID configured correctly? The most common reason for connection failure is an unconfigured or incorrectly pasted Owner ID. Verify in the "Startup" tab that the Player ID from Step 1 is entered correctly.
- Did you restart the server after setting the Owner ID? Configuration changes do not take effect until you restart.
- Are you searching for the world name accurately (case-sensitive)? Enter it exactly as shown in your setup email.
- Is your server status "Running" (green) in the game panel?
- Has it been a few minutes since the server started? The public browser may take a moment to reflect newly started servers.
Currently, RuneScape: Dragonwilds servers support a maximum of 6 concurrent players (a game-side limitation).