
A step-by-step guide to your BESTNET-GSERVER Palworld dedicated server — from ordering to configuration and joining — written so even first-time users can follow along without getting lost.
Revision history
- v1.2
- Jul 2026 — Expanded the detailed-settings (PalWorldSettings.ini) location and steps; added the World data migration chapter.
- v1.1
- Jul 2026 — Updated for the Palworld 1.0 release; added the voice chat (bEnableVoiceChat) setting.
- v1.0
- Jul 2026 — Initial version
Ordering and logging in to the game panel
Once your payment is complete, your server is built automatically and delivered ready to use. It is usually available within a few minutes to a few tens of minutes, and we notify you by email when it is ready.
All server operations are done from the game panel in your browser.
- Using the details in your order confirmation email, log in to the game panel.
- After logging in, select your Palworld server.
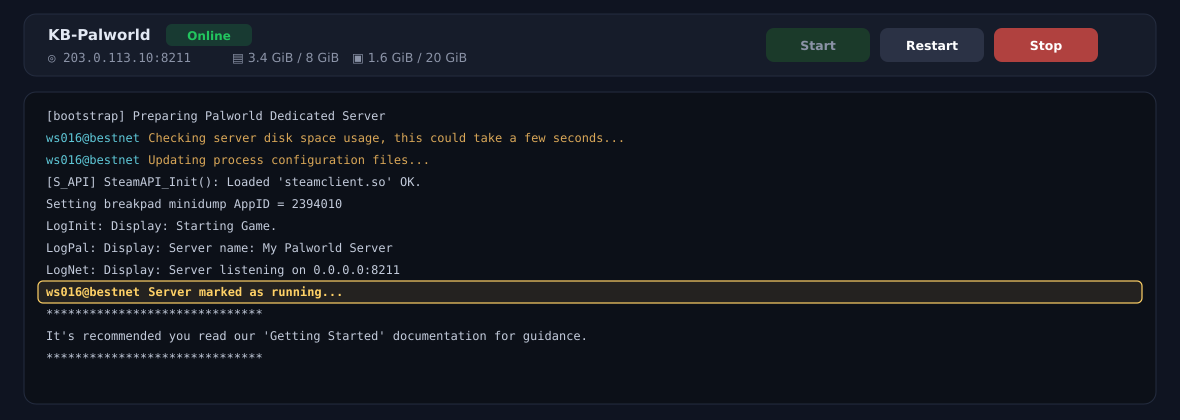
- On the "Console" screen you can check the server's status and logs.
Set the admin password
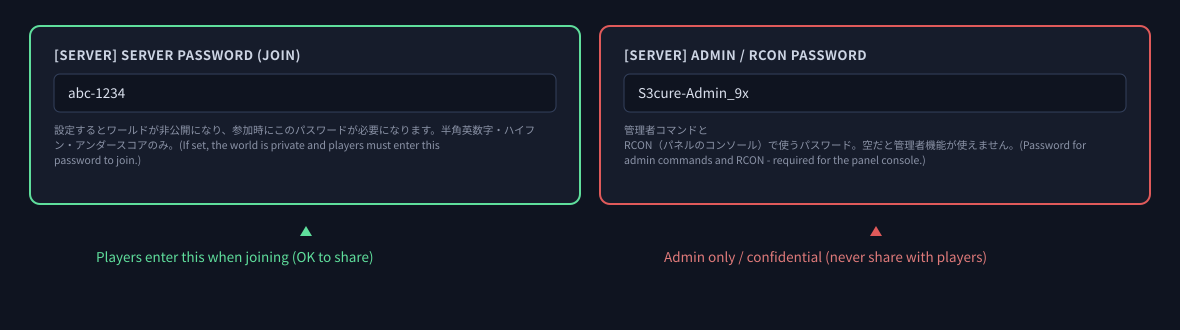
First, set an admin password. This is the most important setting on a Palworld server.
The admin password is used for two things:
- Using admin commands in-game (
/AdminPassword) - Performing management actions from the game panel console, such as kicking players or safely stopping the server
Set it on the game panel's Startup screen. Enter a hard-to-guess string in the "[SERVER] Admin / RCON Password" field (your input is saved automatically and takes effect when the server starts).
Start the server
Once your settings are done, press "Start" on the game panel console screen. The first startup can take a little while as the world is generated.
You will see logs scrolling in the console as startup progresses. After a short wait, the server will be ready for players to join.
Join the server
In Palworld you can join a server in one of the following ways. Your server's connection details (IP address and port) are shown on the server detail screen in the game panel.
Join from the community server list
From the Palworld title screen, open "Join Online" → "Community Servers" and search for the server name you set. Select your server from the results and join. If you set a password, you will be asked for it when joining.
Join by entering the IP address directly
If your server does not appear in the community list, or you want to be sure you connect, a direct connection is convenient. On the "Join" screen, enter the server address in the form IP address:port (e.g. 203.0.113.10:8211) to join.
Cross-play with PS5 and Xbox
Palworld supports cross-play across PC, PS5 and Xbox. Because our servers are listed in the community server list, friends on different platforms can join from that same list.
Set a join password for the server
If you want to play with friends only, set a join password. In Palworld, this is [SERVER] Server Password (join).
- Open Startup from the left menu.
- Enter a password in the [SERVER] Server Password (join) field (alphanumerics, hyphens, and underscores only). Your input is saved automatically.
- Restart the server to apply the change. From then on, the world becomes private and players must enter this password when joining.
- To remove the password, clear the field and restart the server.
Main server settings
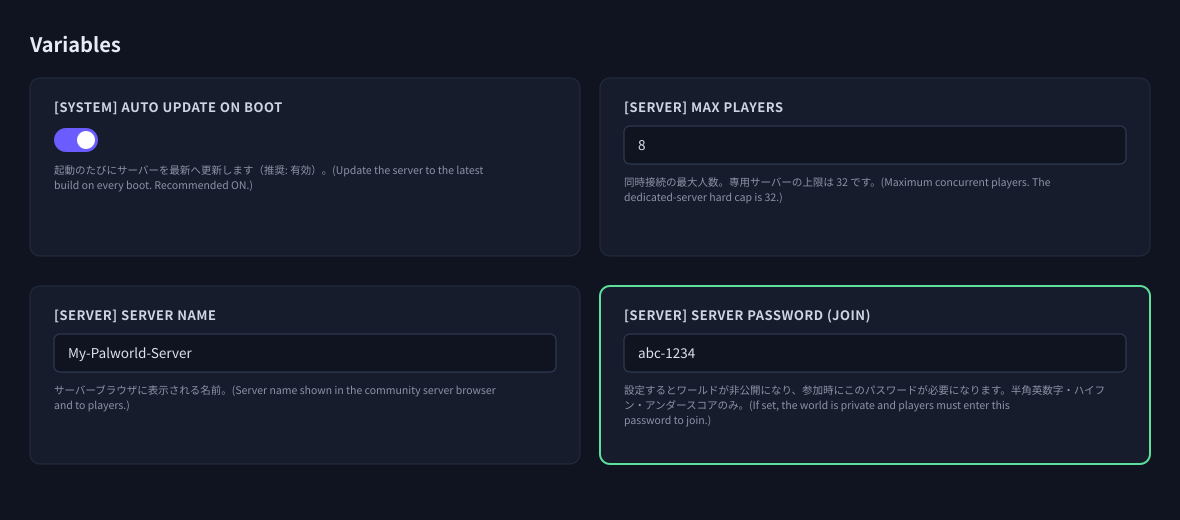
From the game panel's Startup screen, you can change commonly used settings, each with a plain-language description. The main items available in the panel are:
- Server name — the name shown in the community list
- Server password — the password required to join (leave blank to let anyone join)
- Max players — how many can play at once (Palworld's limit is 32)
- Raids (invaders) on/off — toggles invader events
Detailed game balance such as difficulty, EXP rate and capture rate is not available in the panel, so it is changed by editing the config file directly. See "Changing more detailed settings" below for the steps.
Changes take effect after you restart the server.
Enable voice chat (new in the 1.0 release)
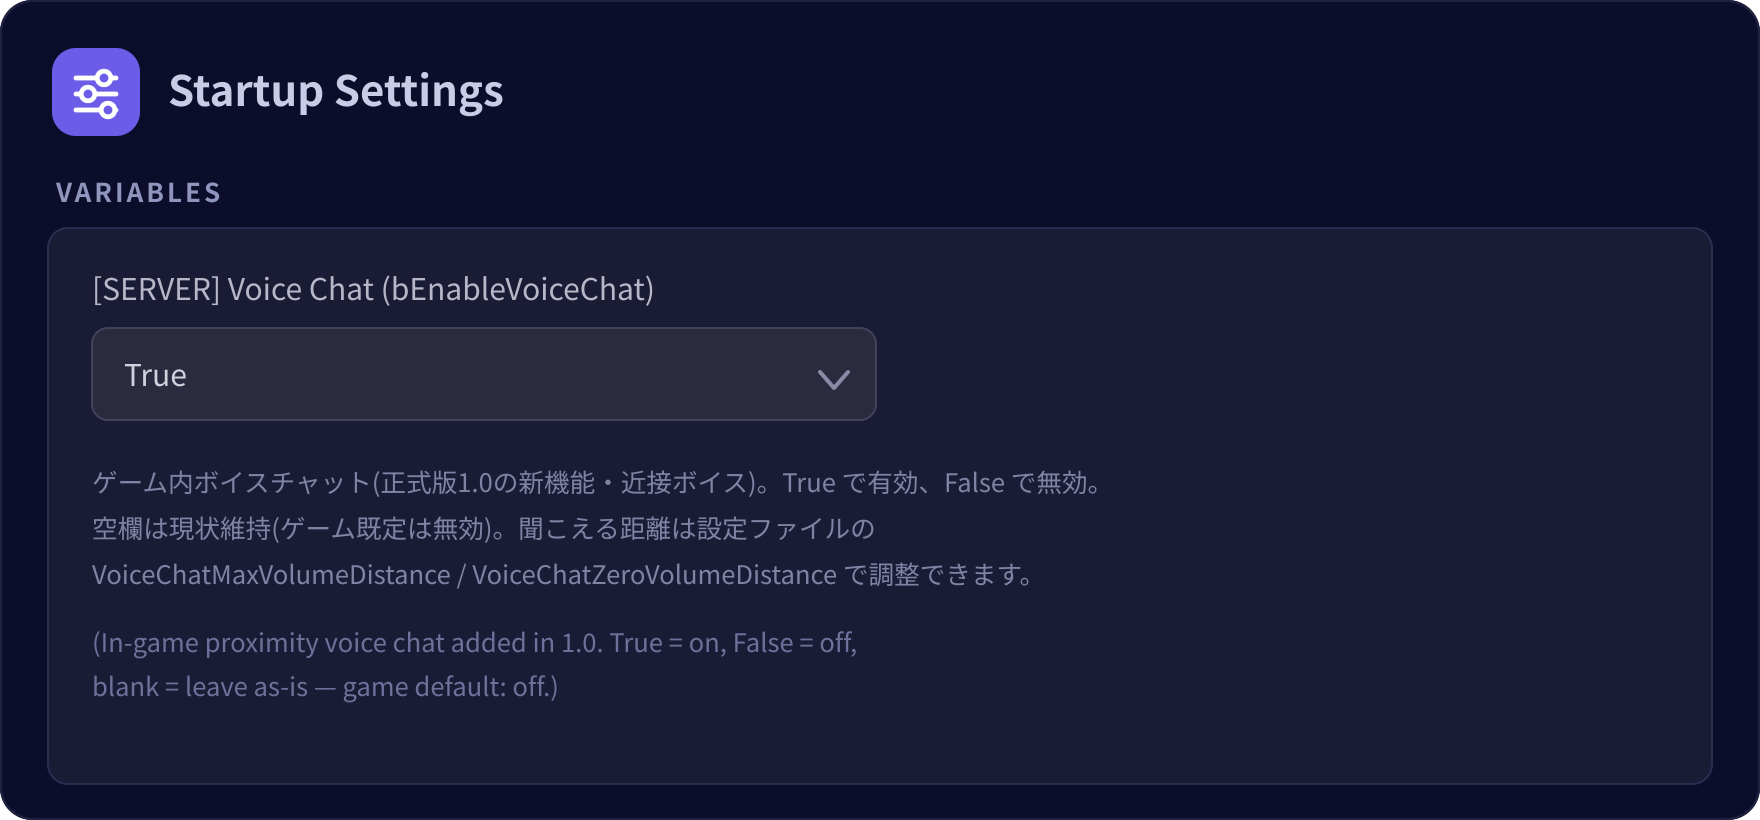
Palworld's full release (1.0) added in-game voice chat (proximity voice). On our servers you can turn it on with just a few clicks from a startup variable in the game panel.
Newly built servers ship with this set to False (disabled). To use voice chat, switch it to True as follows.
- Open the Startup tab in the game panel.
- Under Variables, set
[SERVER] Voice Chat (bEnableVoiceChat)toTrue. - Restart the server and voice chat will be enabled.
VoiceChatMaxVolumeDistance (full volume up to this distance) and VoiceChatZeroVolumeDistance (silent at this distance) in the PalWorldSettings.ini config file.Changing more detailed settings
Palworld has over 100 detailed settings. Detailed game balance such as difficulty, EXP rate and capture rate is not available in the panel, so you change it by editing the PalWorldSettings.ini config file directly. In the game panel's file browser, open Pal → Saved → Config → LinuxServer, and you will find PalWorldSettings.ini inside.
DefaultPalWorldSettings.ini in the server's install root is a sample bundled with the game. Editing it has no effect on your settings. Be sure to edit Pal/Saved/Config/LinuxServer/PalWorldSettings.ini instead.Edit it with the following steps.
- Stop the server from the game panel console.
- Open
Pal/Saved/Config/LinuxServer/PalWorldSettings.iniin the file browser. - Within the single
OptionSettings=(……)line, change the value of the item you want to adjust. - Save, and start the server.
Common setting keys are below. Enter values in the six-decimal-place format (e.g. 1.500000).
- Difficulty —
Difficulty - EXP rate —
ExpRate(e.g.ExpRate=2.000000for 2x) - Capture rate —
PalCaptureRate - Pal damage taken multiplier —
PalDamageRateDefense - How fast a Pal's hunger drops —
PalStomachDecreaceRate
OptionSettings=(……) on the second. Adding lines, or breaking the parentheses or commas, will — by Palworld's design — reset all server settings to their defaults.Advanced Tuning for Power Users (To Further Reduce Stuttering)
↑ The more bases and Pals, the more this gets congested
↑ Split across multiple cores and processed in parallel
Base worker count, save interval, sync distance, etc.
(free, try it right away)
The “foundation” for concurrent
players and large-world stability
※ This tendency is common to games built for large-scale multiplayer and is not a Palworld-specific problem. This diagram reflects observations on our own servers and is not an official statement from the developer, Pocketpair.
Operating a large world with many players and numerous Pals causes each game-engine cycle to take longer, making rubber-banding - those brief rollbacks - more likely. Below are advanced settings to reduce that internal-processing load. If your plan's performance provides the foundation to "run a large world comfortably," these adjustments "lightly optimize that world," and work best in combination. Since some settings affect game rules, please adjust them to your preference (values can be restored anytime).
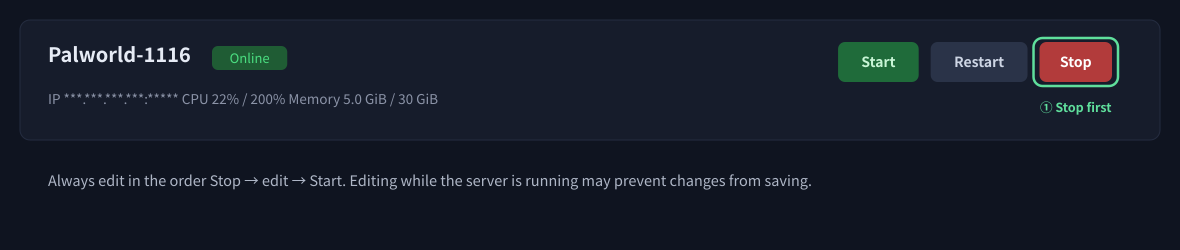
A. World Settings (PalWorldSettings.ini) - High Impact
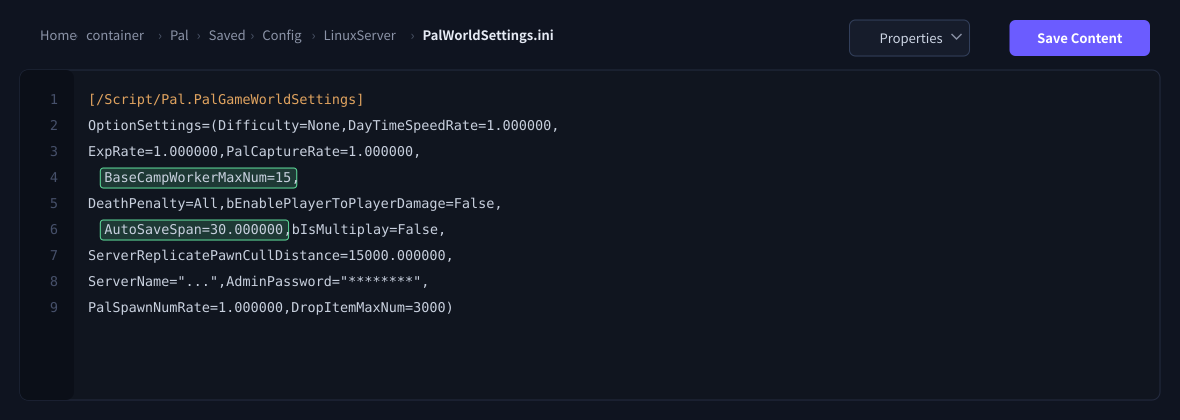
Open the same Pal/Saved/Config/LinuxServer/PalWorldSettings.ini as in section 5.2, and modify the relevant values inside OptionSettings=(...).
| Setting Key | Default → Recommended | Effect (Game Impact) |
|---|---|---|
| BaseCampWorkerMaxNum | 15 → 8〜10 | ★ Most effective. Reduces Pals working at your base, lightening constant pathfinding load (base automation will be slightly less active). |
| AutoSaveSpan (seconds) | 30 → 300〜600 | Lowers the frequency of brief stutters from auto-save (rare rollback points may be slightly older). |
| ServerReplicatePawnCullDistance | 15000 → 8000〜10000 | Reduces sync and network traffic from distant Pals (distant Pal appearance changes). |
| PalSpawnNumRate | 1.0 → 0.8〜0.9 | Reduces wild Pal spawning. |
| DropItemMaxNum / DropItemAliveMaxHours | 3000→2000 / 1.0→0.3〜0.5 | Reduces dropped-item tracking. |
B. Rendering & GC Stabilization (Engine.ini)
Open Engine.ini from the same folder (it exists, but add the following section at the end if these entries are missing), save, and start.
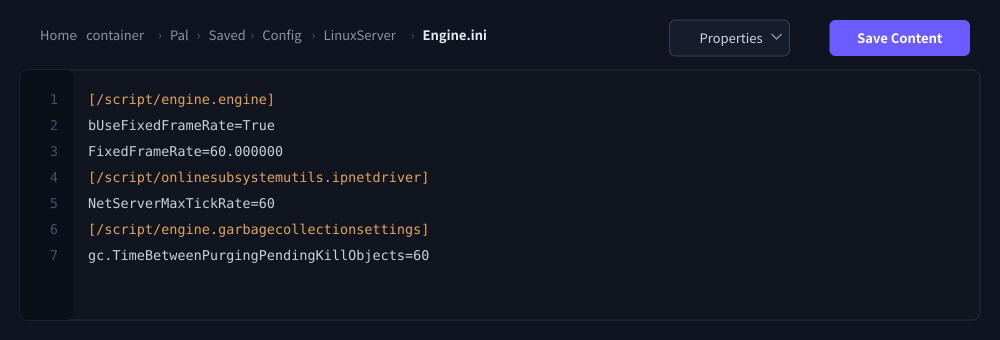
[/script/engine.engine]
bUseFixedFrameRate=True
FixedFrameRate=60.000000
[/script/onlinesubsystemutils.ipnetdriver]
NetServerMaxTickRate=60
[/script/engine.garbagecollectionsettings]
gc.TimeBetweenPurgingPendingKillObjects=60
Reduces CPU spikes from frame fluctuation and momentary stalls from periodic garbage collection (memory cleanup) - a contributor to hitches.
No improvement? - Please contact support without hesitation. We'll check infrastructure factors and other points beyond your config tuning. See section 07, "Backups and Scheduled Restarts," for operational measures (daily auto-restart, backup frequency).
Console and admin commands
From the game panel console screen, you can send admin commands to the server: check, kick and ban players, announce to everyone, save, safely stop, and more. These operations use the admin password you set in Chapter 02.
Examples of common commands:
ShowPlayers— list the players currently connectedBroadcast <message>— send a message to everyoneSave— save the worldShutdown <seconds>— stop the server after a warning
Save works but save does not. Enter them exactly as written.Backups and scheduled restarts
Depending on your plan, our servers keep 3 to 30 generations of backups. From the backup screen in the game panel you can restore your world with a single click — reassuring if you accidentally lose a base or data.
We recommend scheduled restarts
Palworld servers tend to use gradually more memory the longer they run continuously. Using the game panel's schedule feature to set an automatic restart every 6 to 12 hours helps keep performance stable.
Applying updates
Palworld updates (patches) are applied by simply restarting your server. The latest build is downloaded and applied automatically on startup, so no manual SteamCMD operations are needed.
[SYSTEM] Auto Update on Boot(Startup tab / default: on): toggles auto-update on boot. Turn it off only if you want to pin a specific version.[SYSTEM] Validate Files on Update (repair)(default: off): re-fetch with a file-integrity check (repair mode). If startup problems occur, turn it on temporarily, restart, then turn it back off.
Migrating world data
You can also move a world you are already playing to your BESTNET-GSERVER Palworld server. The steps, and how much can be carried over, depend on where you are migrating from.
What carries over, by source:
- Another provider's dedicated server / your own SteamCMD dedicated server — both the world and players carry over (the host character does not need to be recreated).
- Steam co-op (playing together via an invite code) / console (PS5, Xbox) or the Microsoft Store / Game Pass build — the host's player character (level, gear, owned Pals, guild) cannot be carried over as-is and is created anew. Community tools may transfer it in some cases, but that is outside our support.
Migration from a dedicated server (another provider, or your own SteamCMD) is done as follows.
- Download the alphanumeric-named folder inside
Pal/Saved/SaveGames/0/on the source server. - Start your BESTNET server once and then stop it, to generate the initial save.
- With the server stopped, upload the world folder to
Pal/Saved/SaveGames/0/(SFTP is convenient for large data). Do not includeWorldOption.sav— this lets our settings take priority. - Set
DedicatedServerName=inPal/Saved/Config/LinuxServer/GameUserSettings.inito match the uploaded folder's name. - Start the server and check that the world has loaded.
Troubleshooting
Cannot join the server
Check in the console that the server has fully started; right after startup you may not be able to join. If it does not appear in the community list, try the direct connection (IP address:port) from Chapter 04. Typos in the server name or password are also a common cause.
Settings are not applied
Settings take effect when the server is restarted. Changes made while it is running may not apply, so stop the server, change the setting, and restart. After a world has been created, some game-balance settings may be overwritten by the world's own saved values.
Slow or crashing
There may not be enough memory for the number of players or the state of the world. Set up scheduled restarts (Chapter 07), or consider upgrading to a higher plan. Plan changes keep your data and take just a few minutes.
Next steps
That covers the basic setup. To run your server even more comfortably, take a look at these articles too.


