
- Before you start
- Finding your login details
- Logging in to the game panel
- Dashboard
- Looking at the details
- Connecting to your game server over FTP
- Account security (password and two-factor authentication)
- A smoother server (one-click server optimisation)
The game panel provides every feature you need to run your server. This article covers everything from how to log in, through an overview of each feature, to connecting by FTP.
Before you start
The game panel provides every feature you need to run your server. Logging in is very simple — just follow the steps below in order.
Finding your login details
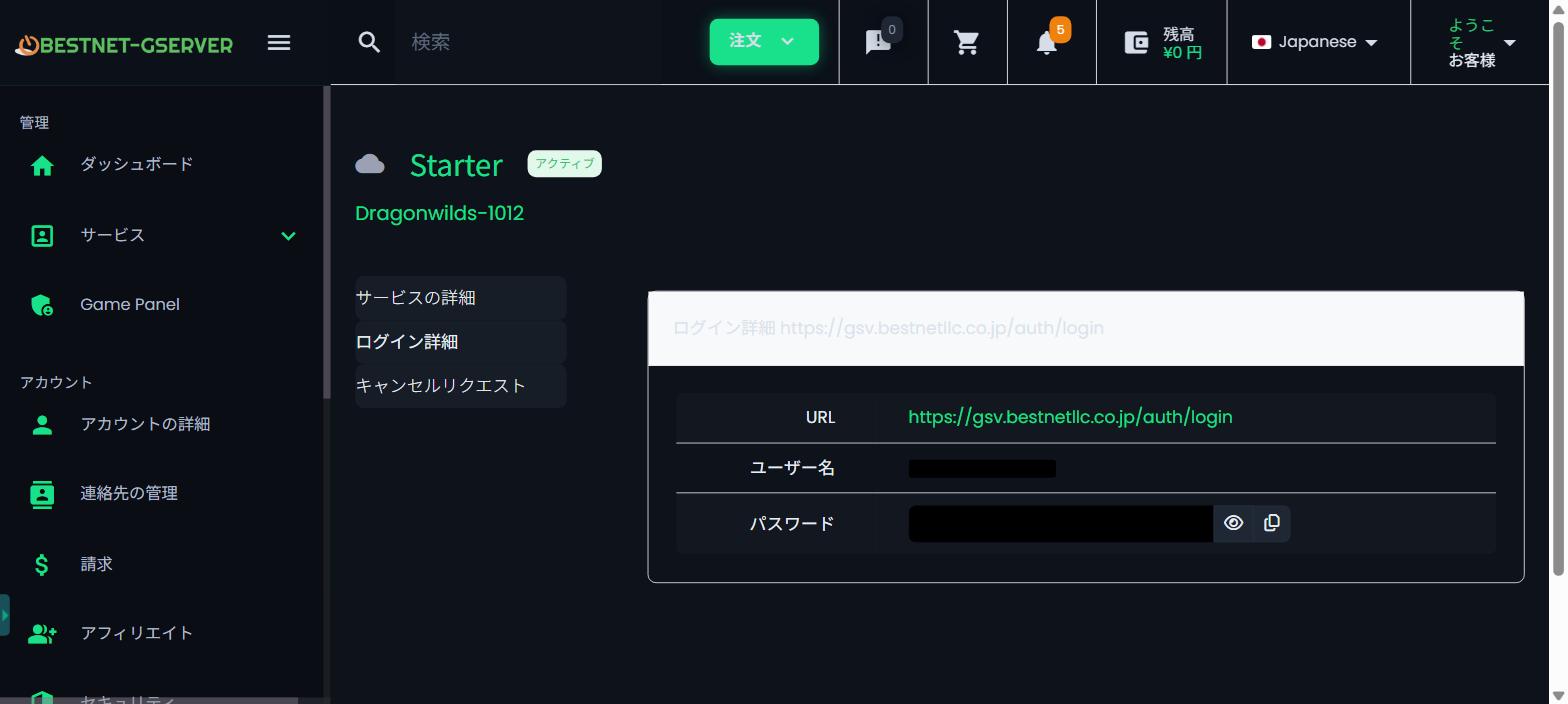
The details you need to log in are included in the email our system sends automatically when your order is completed. You can also find them in the client portal as follows.
- Log in to the client portal and click “Services” in the left-hand menu
- Click your active server, then click “Login Details”
Your login details are shown as in the image below.
Logging in to the game panel
Next, use those details to log in to the game panel. Simply enter your username and password and click the “Login” button.
Dashboard
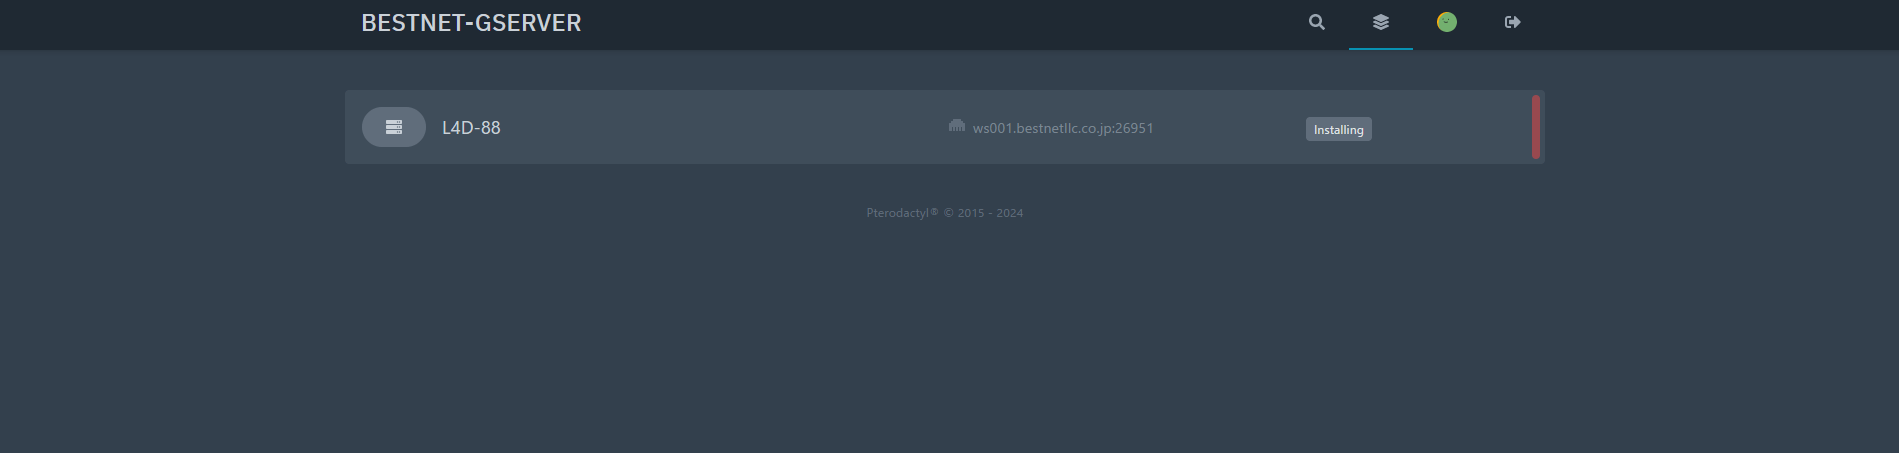
Once you log in, the dashboard is shown as in the image below. If you have more than one server, they all appear here, which makes managing them straightforward.
Click a game server on the dashboard to see its details and to manage it.
Looking at the details
Our game panel supports multiple display languages. For how to change the language, see How to change the panel language →.
Console screen
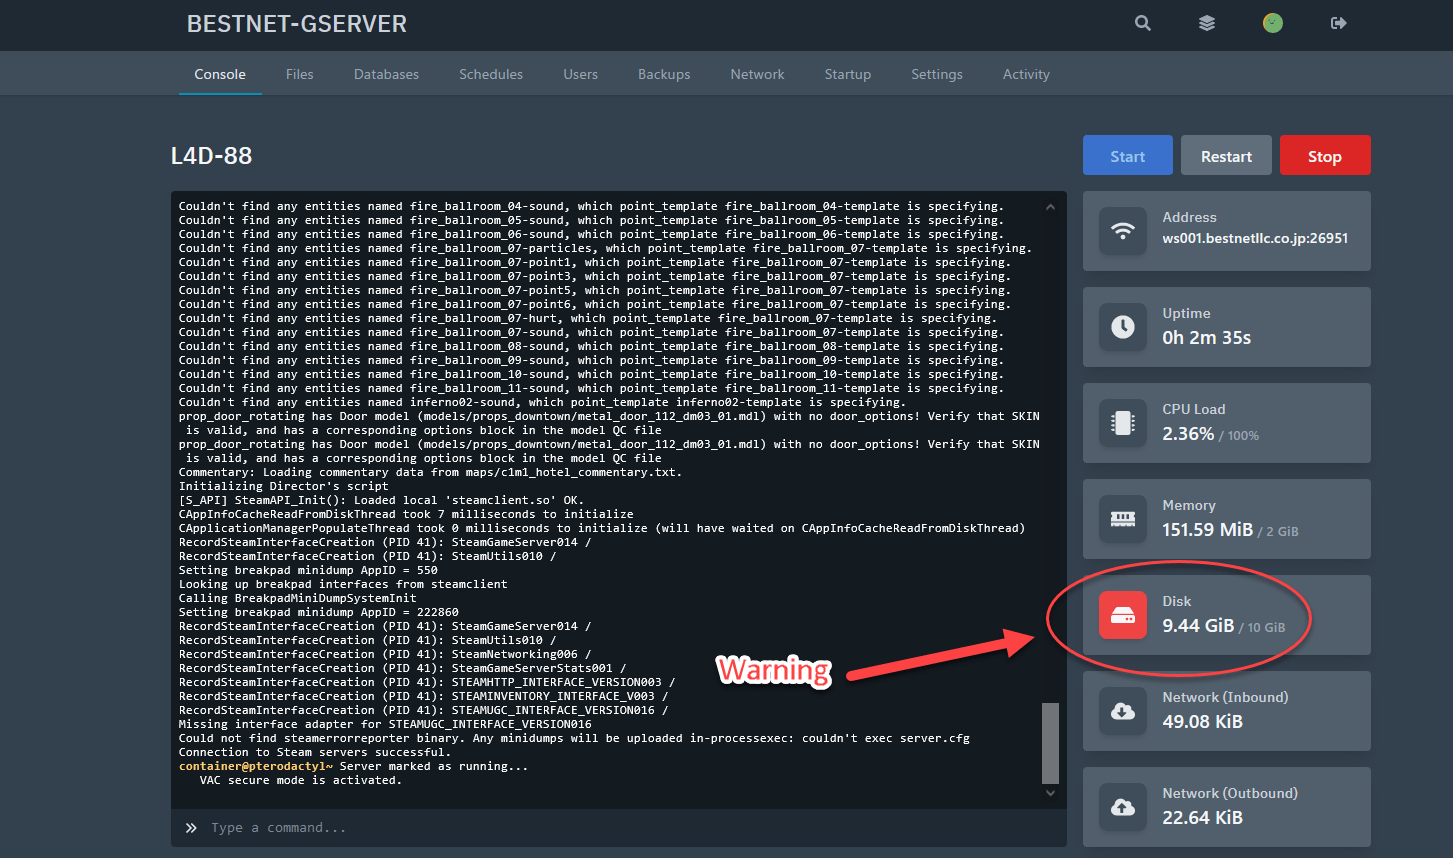
The console screen shows the status of your game server. The layout is designed to be self-explanatory; when a resource reaches its limit, the matching resource icon turns red.
File browser
The file browser (file manager) lets you view and edit the files on your server directly. Use it to edit configuration files, add mods and so on.
The basics
Click a folder name to open it; the breadcrumb at the top (“Home › …”) shows where you are. Use the “⋯” menu at the right of each row to choose an action for that file or folder. Clicking the name of a text file opens the editor.
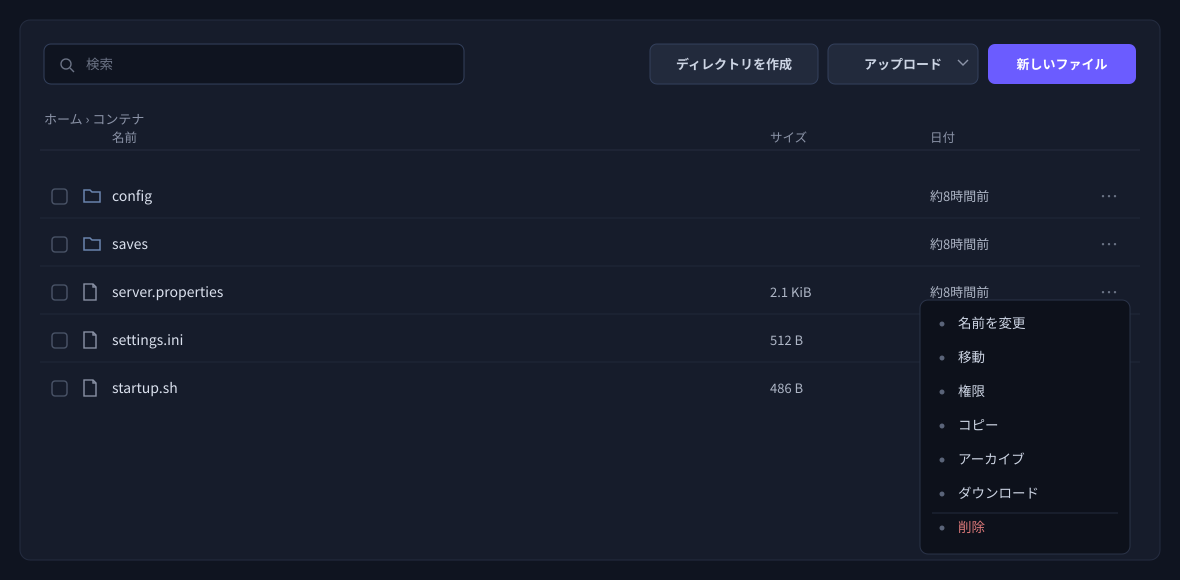
The main actions available from the “⋯” menu are as follows.
- Rename: changes the file name.
- Copy: creates a duplicate in the same folder. It is named “… copy.extension” automatically, and the original file is left untouched.
- Download: saves the file to your own PC.
- Archive: packs the selected files and folders into a single compressed file (.tar.gz). You can also unpack a compressed file from the “⋯” menu.
- Permissions: changes the file access permissions. You normally do not need to change these.
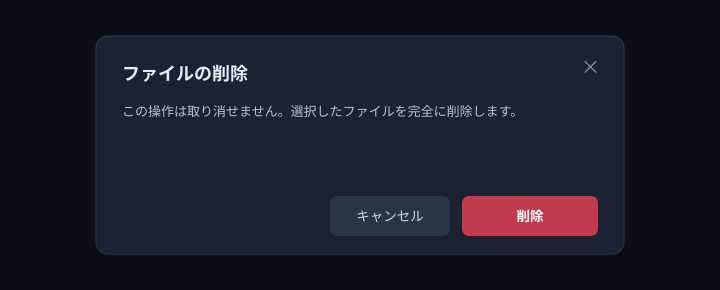
- Delete: deletes the file or folder (this cannot be undone).
Creating and uploading: use “New File”, “Create Directory” and “Upload” at the top. Uploads are per file; you cannot upload a whole folder.
Moving files (easy to get wrong)
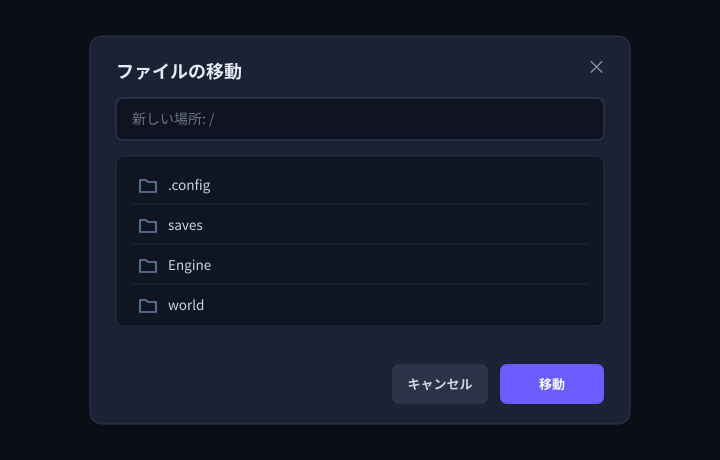
Choosing “⋯” → “Move” opens a screen for specifying the destination. What you specify here is the destination folder. Either click through the folders in the list, or type the destination path into the “New location” field and press “Move”. The file name itself does not change. You can also move a file by dragging and dropping it onto a folder.
When a file of the same name already exists (important)
What happens when a file of the same name already exists at the destination depends on the action. This is particularly easy to get wrong, so please check the diagram below.
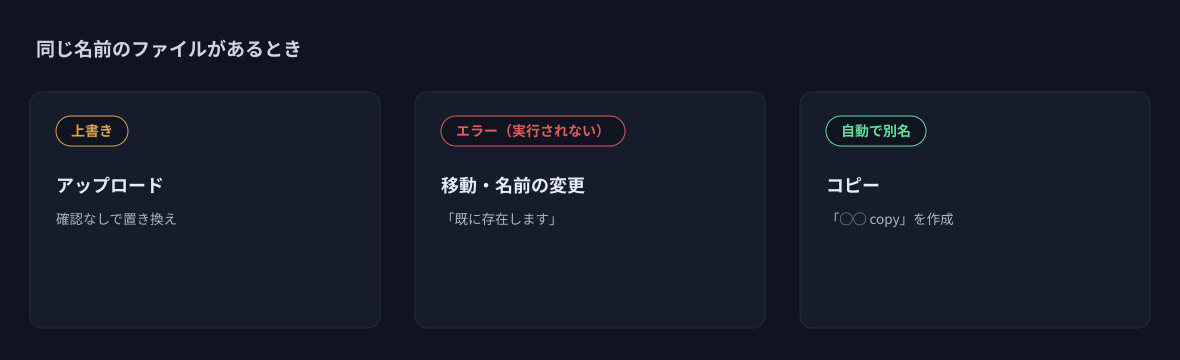
- Upload: overwrites a file of the same name without asking. Back up important files first (see 5.5).
- Move and rename: if the same name already exists at the destination, you get an “already exists” error and nothing happens (nothing is overwritten). Delete or rename the existing file first.
- Copy: automatically uses a different name (“… copy”) and does not overwrite the existing file.
Acting on several items at once
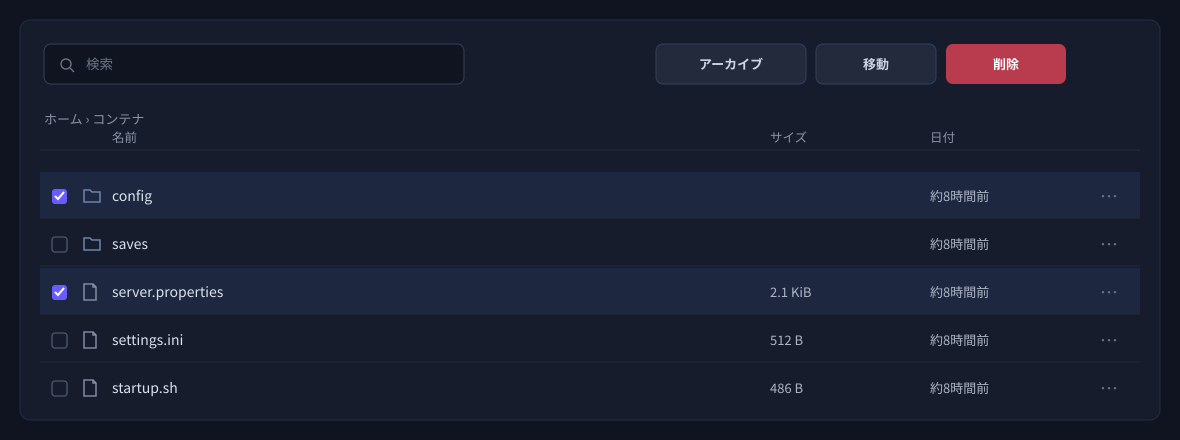
Select several files or folders with the checkbox at the left of each row, and the buttons at the top right change to “Archive”, “Move” and “Delete”, letting you act on everything you selected at once.
Schedules
With the schedule feature you can set up recurring tasks — for example, restarting the server every day at 4 a.m.
User permission groups
This feature is useful when you want to manage the game server together with friends. Enter the email address of the person you want to add, tick the actions you want to allow, and click the “Invite” button; our game panel then sends an invitation email automatically.
Backups
You can keep as many backups as your plan allows. Give the backup file a name and click the “Start Backup” button.
Rotating backups automatically (schedules)
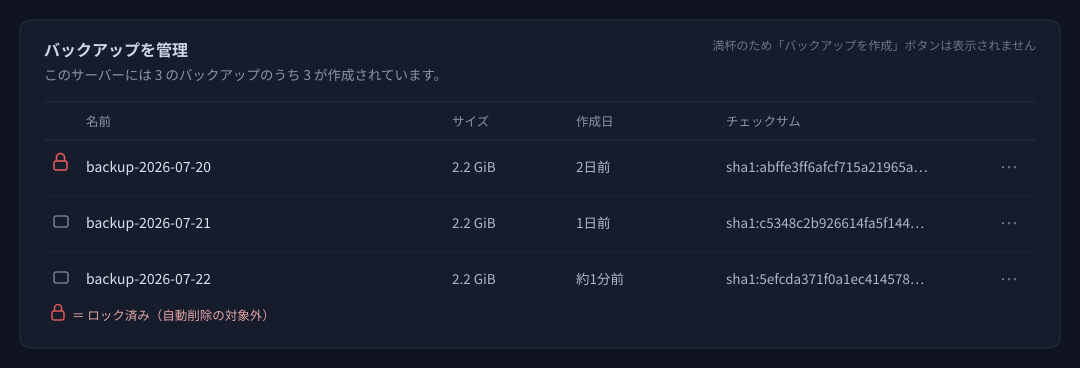
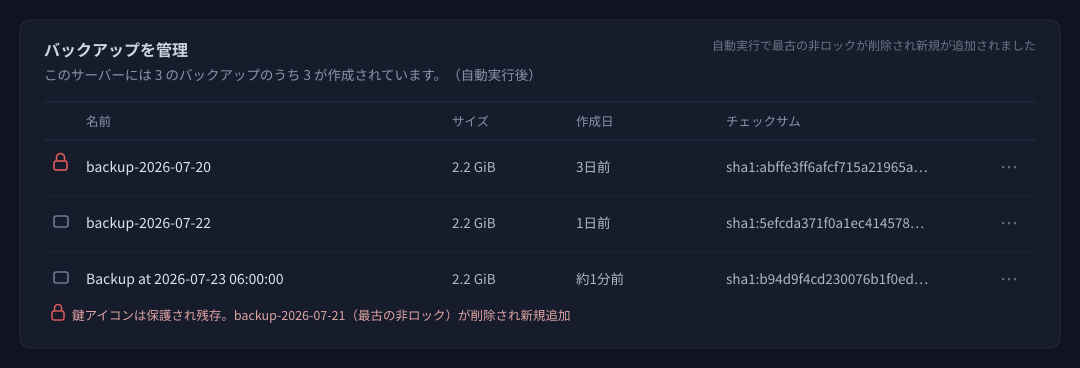
If you want “the oldest one removed automatically whenever a new backup is taken, keeping a fixed number”, use an automatic backup via the schedule feature. Even when you are at the limit, a scheduled automatic backup deletes the oldest backup first and then creates the new one (so the most recent generations are always kept, within the backup count for your plan).
How to set it up
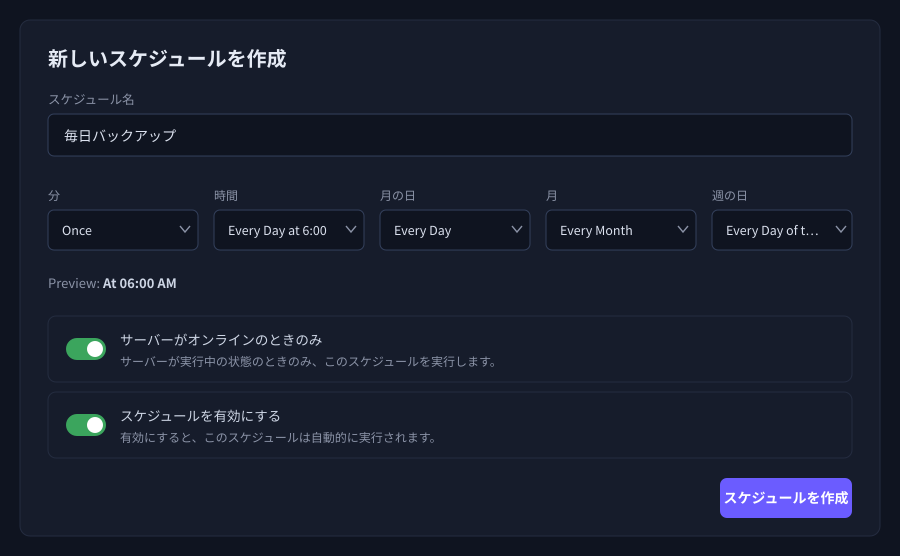
- Open “Schedules” from the left-hand menu and click “Create Schedule”.
- Set the schedule name and when it runs (for example, Minute = Once, Hour = Every Day at 6:00 AM for 6 a.m. daily). To specify an arbitrary time, switch to “advanced” and enter it in cron format.
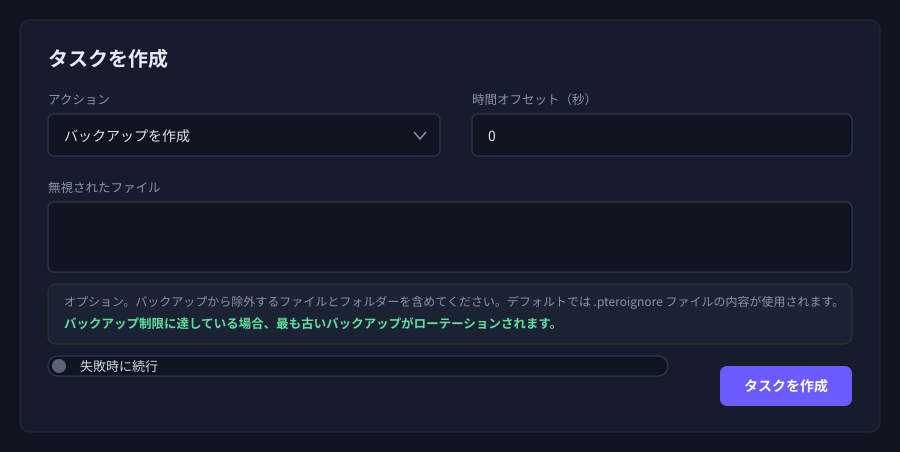
- After creating it, open “Manage Schedule” and click “New Task”.
- Choose “Create Backup” as the action and save with “Create Task” (list anything you want left out under “Ignored Files”).
- At the specified time the backup is created automatically, and if you are at the limit the oldest one is replaced automatically. To check straight away, use “Run Now” on the schedule detail screen.
Protecting a backup you want to keep (lock)
For an important backup, choose “Lock” from the “⋯” menu in the list and it is excluded from automatic deletion (rotation) (a padlock icon appears to the left of the name).
Note that a locked backup still uses one of your slots. If you lock all of them, automatic rotation can no longer work.
The number of backups you can keep depends on your plan and on the game title, and is higher on higher plans. You can check your current limit on the backup screen, where it reads “△ of ◯ backups have been created for this server” (◯ is the limit). If you want to keep more generations, please consider upgrading to a higher plan.
Network
Here you can check the IP address and port numbers assigned to your game server. The one marked “Primary” is the game port.
Startup
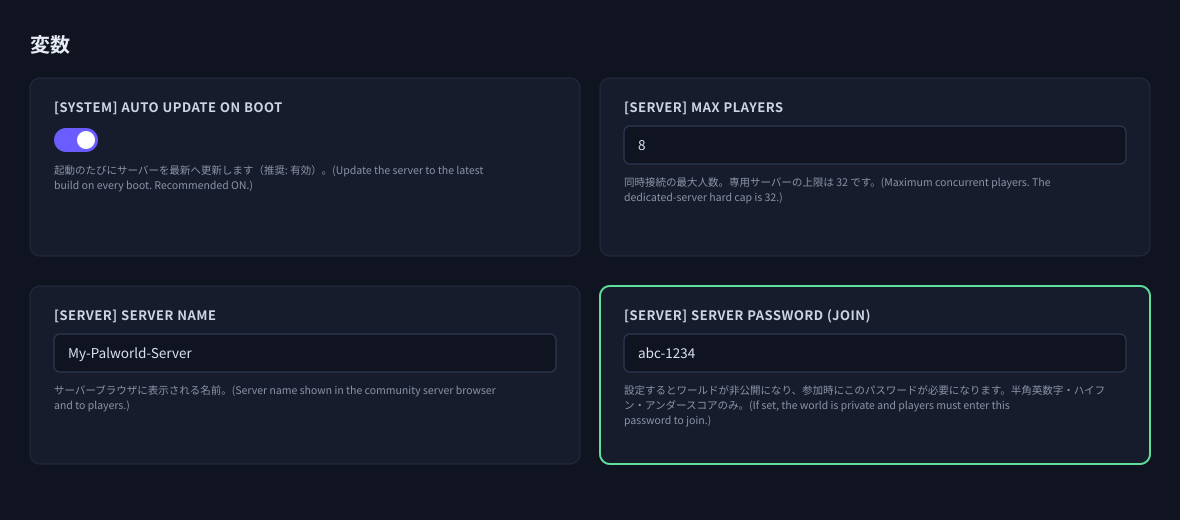
The “Startup” screen lets you view and change the settings (variables) applied when the server starts. The variables shown differ by game title (the examples below are from Palworld). Changes to the input fields are saved automatically and take effect the next time the server starts (after a restart).
Putting a join password on your server
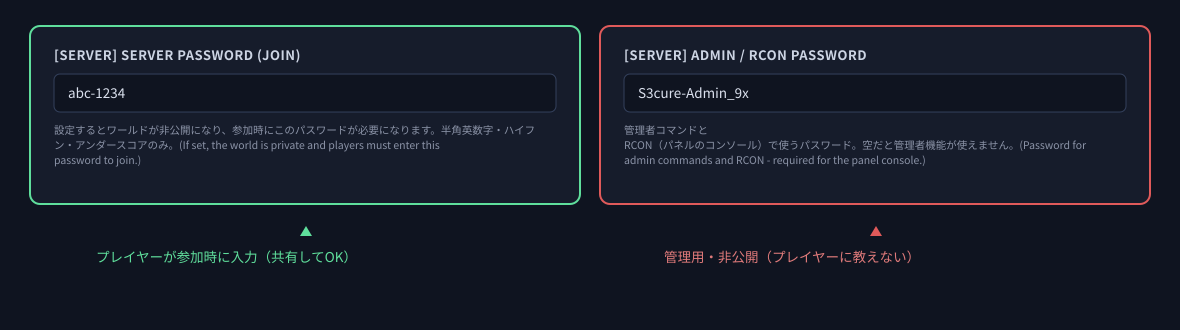
When you want to play with friends only, set a join password. In Palworld this is “[SERVER] Server Password (join)”.
- Open “Startup” in the left-hand menu.
- Enter a password in the “[SERVER] Server Password (join)” field (letters, digits, hyphens and underscores only). What you type is saved automatically.
- Restart the server to apply it. From then on the world is private, and players must enter this password to join.
- To remove the password, empty the field and restart.
Activity
Here you can review a log of the actions carried out on your game server.
Settings
The “Settings” screen lets you check the SFTP connection details, the server name and debug information (node / server ID), and lets you reinstall the server.
Reinstalling the server (reset)
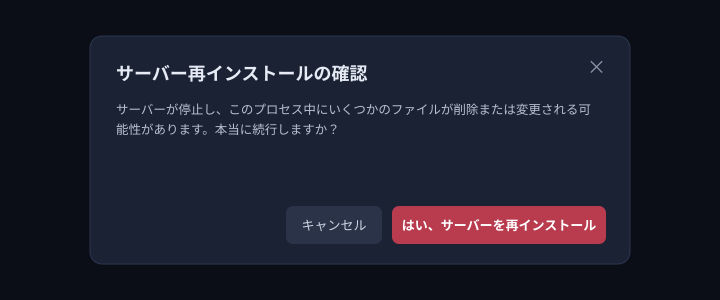
“Reinstall Server” runs the installation script that was used when your server was first built, returning the server to something close to its initial state. When you run it the server stops once, and some files may be deleted or changed during the process.
When to use it
- When you want to wipe the server back to a clean state and start again (a reset).
- When the server no longer starts properly — because a configuration file is corrupted, for example — and you want to recover by returning it to its initial state.
Steps
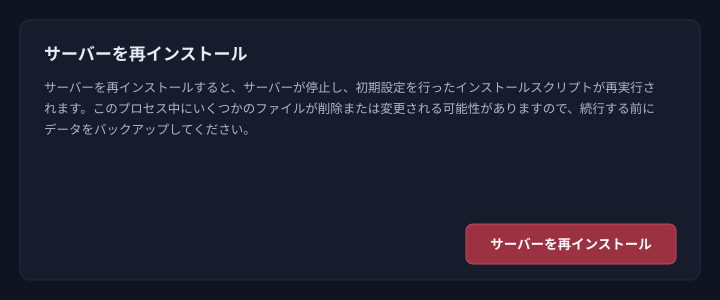
- Open “Settings” in the left-hand menu and scroll to “Reinstall Server” at the bottom right of the screen.
- Before running it, finish backing up (see 5.5) or downloading the data you need.
- Click the “Reinstall Server” button and a confirmation appears. Read it, and if you are happy to proceed click “Yes, Reinstall Server”.
- The reinstall begins. It takes a while to finish (you can follow its progress on the “Console” screen). Start the server once it is done.
Reinstallation Procedure When the Server Fails to Start
Connecting to your game server over FTP
FTP is convenient when you want to upload mod files and the like to your game server. The connection uses SFTP, so the traffic is encrypted and you can use it with confidence.
Downloading an FTP client
There is no particular restriction on which FTP client you use, but we recommend FileZilla.
Install it once the download has finished.
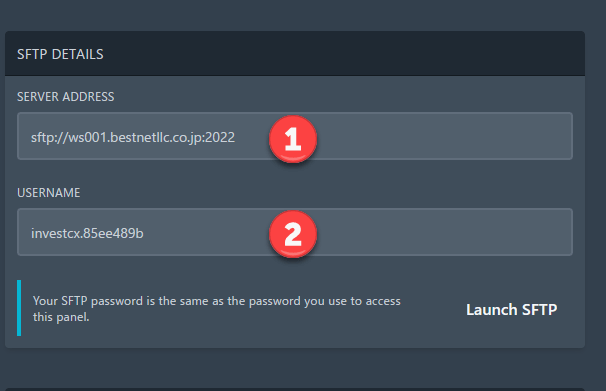
Entering the connection details
First, find the details you need under “Settings” in the game panel. Then fill in each field, using the images below as a guide.
- Host: copy and paste from the game panel
- Username: copy and paste from the game panel
- Password: the password you use to log in to the game panel
Once everything is filled in, click “Quickconnect”.

Uploading files
Once connected, you can upload folders several levels deep to the game server as they are.
Account security (password and two-factor authentication)
You can manage your game panel login details at any time from “Account” in the left-hand menu. This section explains how to change your login password and how to set up two-factor authentication (2FA). We strongly recommend enabling two-factor authentication to protect your game server from unauthorised logins.
Changing your login password
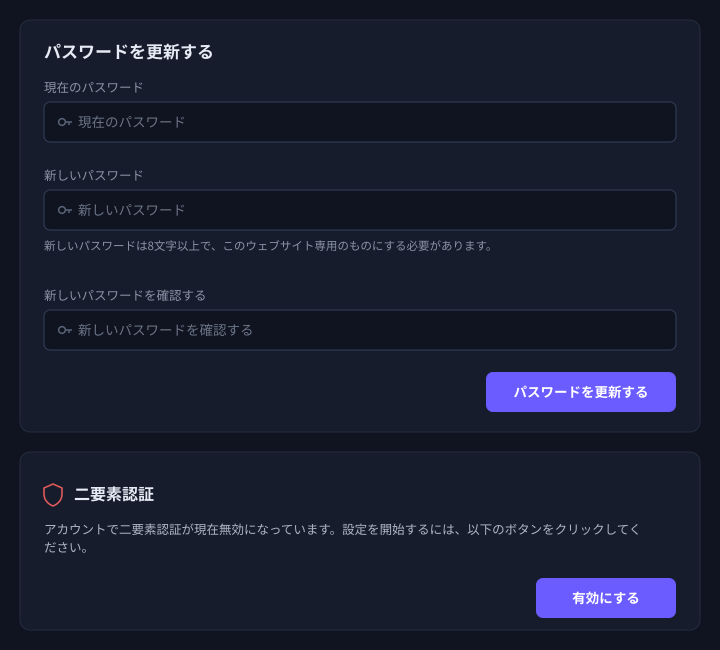
Open “Account” in the left-hand menu and change it under “Update Password” on the right.
- Enter your current password under “Current Password”.
- Enter the new password under “New Password” (at least 8 characters; we recommend a dedicated password that you do not reuse on other services).
- Enter the same password again under “Confirm New Password” and click “Update Password”.
Setting up two-factor authentication (2FA)
With two-factor authentication enabled, logging in requires a six-digit code from an authenticator app in addition to your password. Even if your password leaks, unauthorised logins are prevented.
What you need beforehand: an authenticator app on your phone (Google Authenticator, Microsoft Authenticator, Authy and so on).
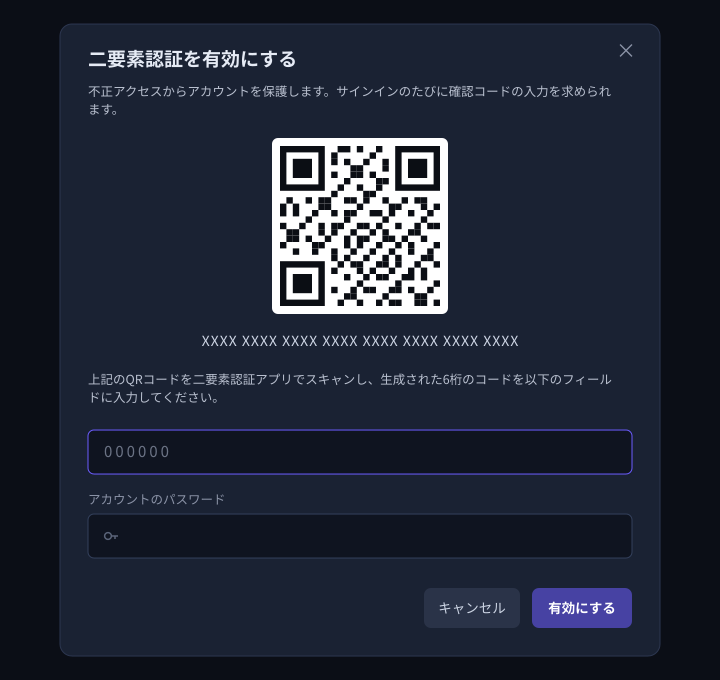
- Click “Enable” under “Two-Factor Authentication” on the “Account” screen.
- Scan the QR code shown with your authenticator app (if you cannot scan it, type in the text key shown below it by hand).
- Enter the six-digit code shown in your authenticator app together with your account password, and click “Enable”.
- Keep the recovery codes shown after enabling it somewhere safe. They let you log in if you lose your phone or change to a new one.
A smoother server (one-click server optimisation)
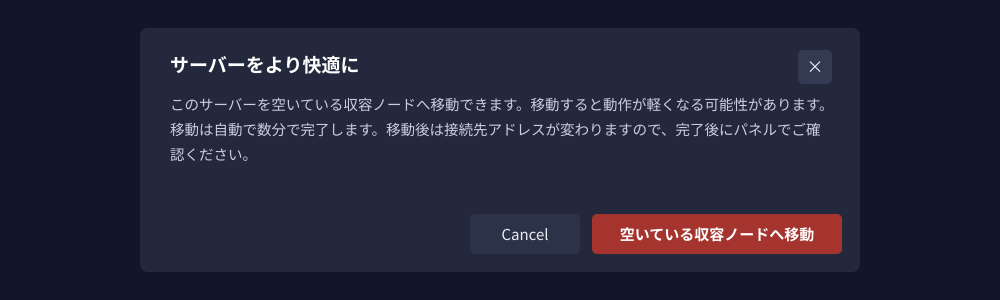
So that you can play comfortably even at busy times, you can move your server to one with more headroom yourself, with a single click. Our system chooses the destination automatically.
When “A smoother server” appears in the game panel, all you do is press the button. It is also available from the “Settings” tab.
| Item | Details |
|---|---|
| What is carried over | Your world data and server settings are carried over as they are. |
| How long it takes | The move finishes automatically in a few minutes. The server is stopped temporarily during that time. |
| When it appears | The offer only appears when a better destination is available. When it is not shown, your current server already has plenty of headroom. |
| Cost | There is no extra charge. Customers on eligible plans can use it free of charge. |
| Supported titles | Supported titles including Palworld, Arma Reforger and RuneScape: Dragonwilds |


